The sound hole on this cajon is on the bottom. Free plans are found here. And most significantly, the front of the sound hole is offset from the back. In theory, because the bottom of the cajon is lower in the back, escaping sound will be focused out the front, and that is what seems to happen.
Firebox Cajon Open Hearth Model showing the large, downward facing, offset sound hole.Looking into the sound hole from the front. This is the only sound hole on the cajon.Interior of the Open Hearth model looking from the front to back showing the bass port bar in front and the lower panel on the bottom in the back of the cajon.
Pros:
As with bass reflex port cajons and ‘busking’ cajons, sound is directed forward, toward the audience.
There is greater tapa surface area than a bass reflex cajon of the same height because the bass port bar is lower.
Mic’ing the cajon is simple because the bass mic can rest on the floor on a simple foam pad or on the carpet.
The large opening means the interior of the cajon is readily available. You could easily pack a small suitcase’s volume of clothing in the cajon.
On-off snare assemblies that require access via the sound hole are much easier to access.
The cajon may be lighter. The large sound hole uses less wood than a conventional sound hole although the bottom bracket adds weight. Designs with less bottom bracket material are possible.
Cons:
The composition of your floor will effect the tone and loudness of the cajon. I prefer it on carpet. But on a wooden floor it is louder. In some perspectives this could be listed as a ‘Pro’ – it gives tone and loudness options.
As with any bass reflex cajon, the tapa surface area is lower than a standard design.
The design is more complicated to make.
The design is not traditional.
Construction Tips
There are several ways to build the bottom structure, some of which are much simpler than my preferred method. I like the look of this design, there is a bar of nice wood across the bottom of the side panels. Also, I’m using western red cedar which is not a strong wood, so I’m reinforcing it. I’ll show some of the simpler designs in later posts.
Note that the sides of my cajons are ‘right trapezoids’, not rectangles – the box has an inclined front. So while the top of the cajon is 12×12 inch square, the bottom is a 12×14 inch rectangle. The principles would be the same for a square bottom, only the proportions would be different.
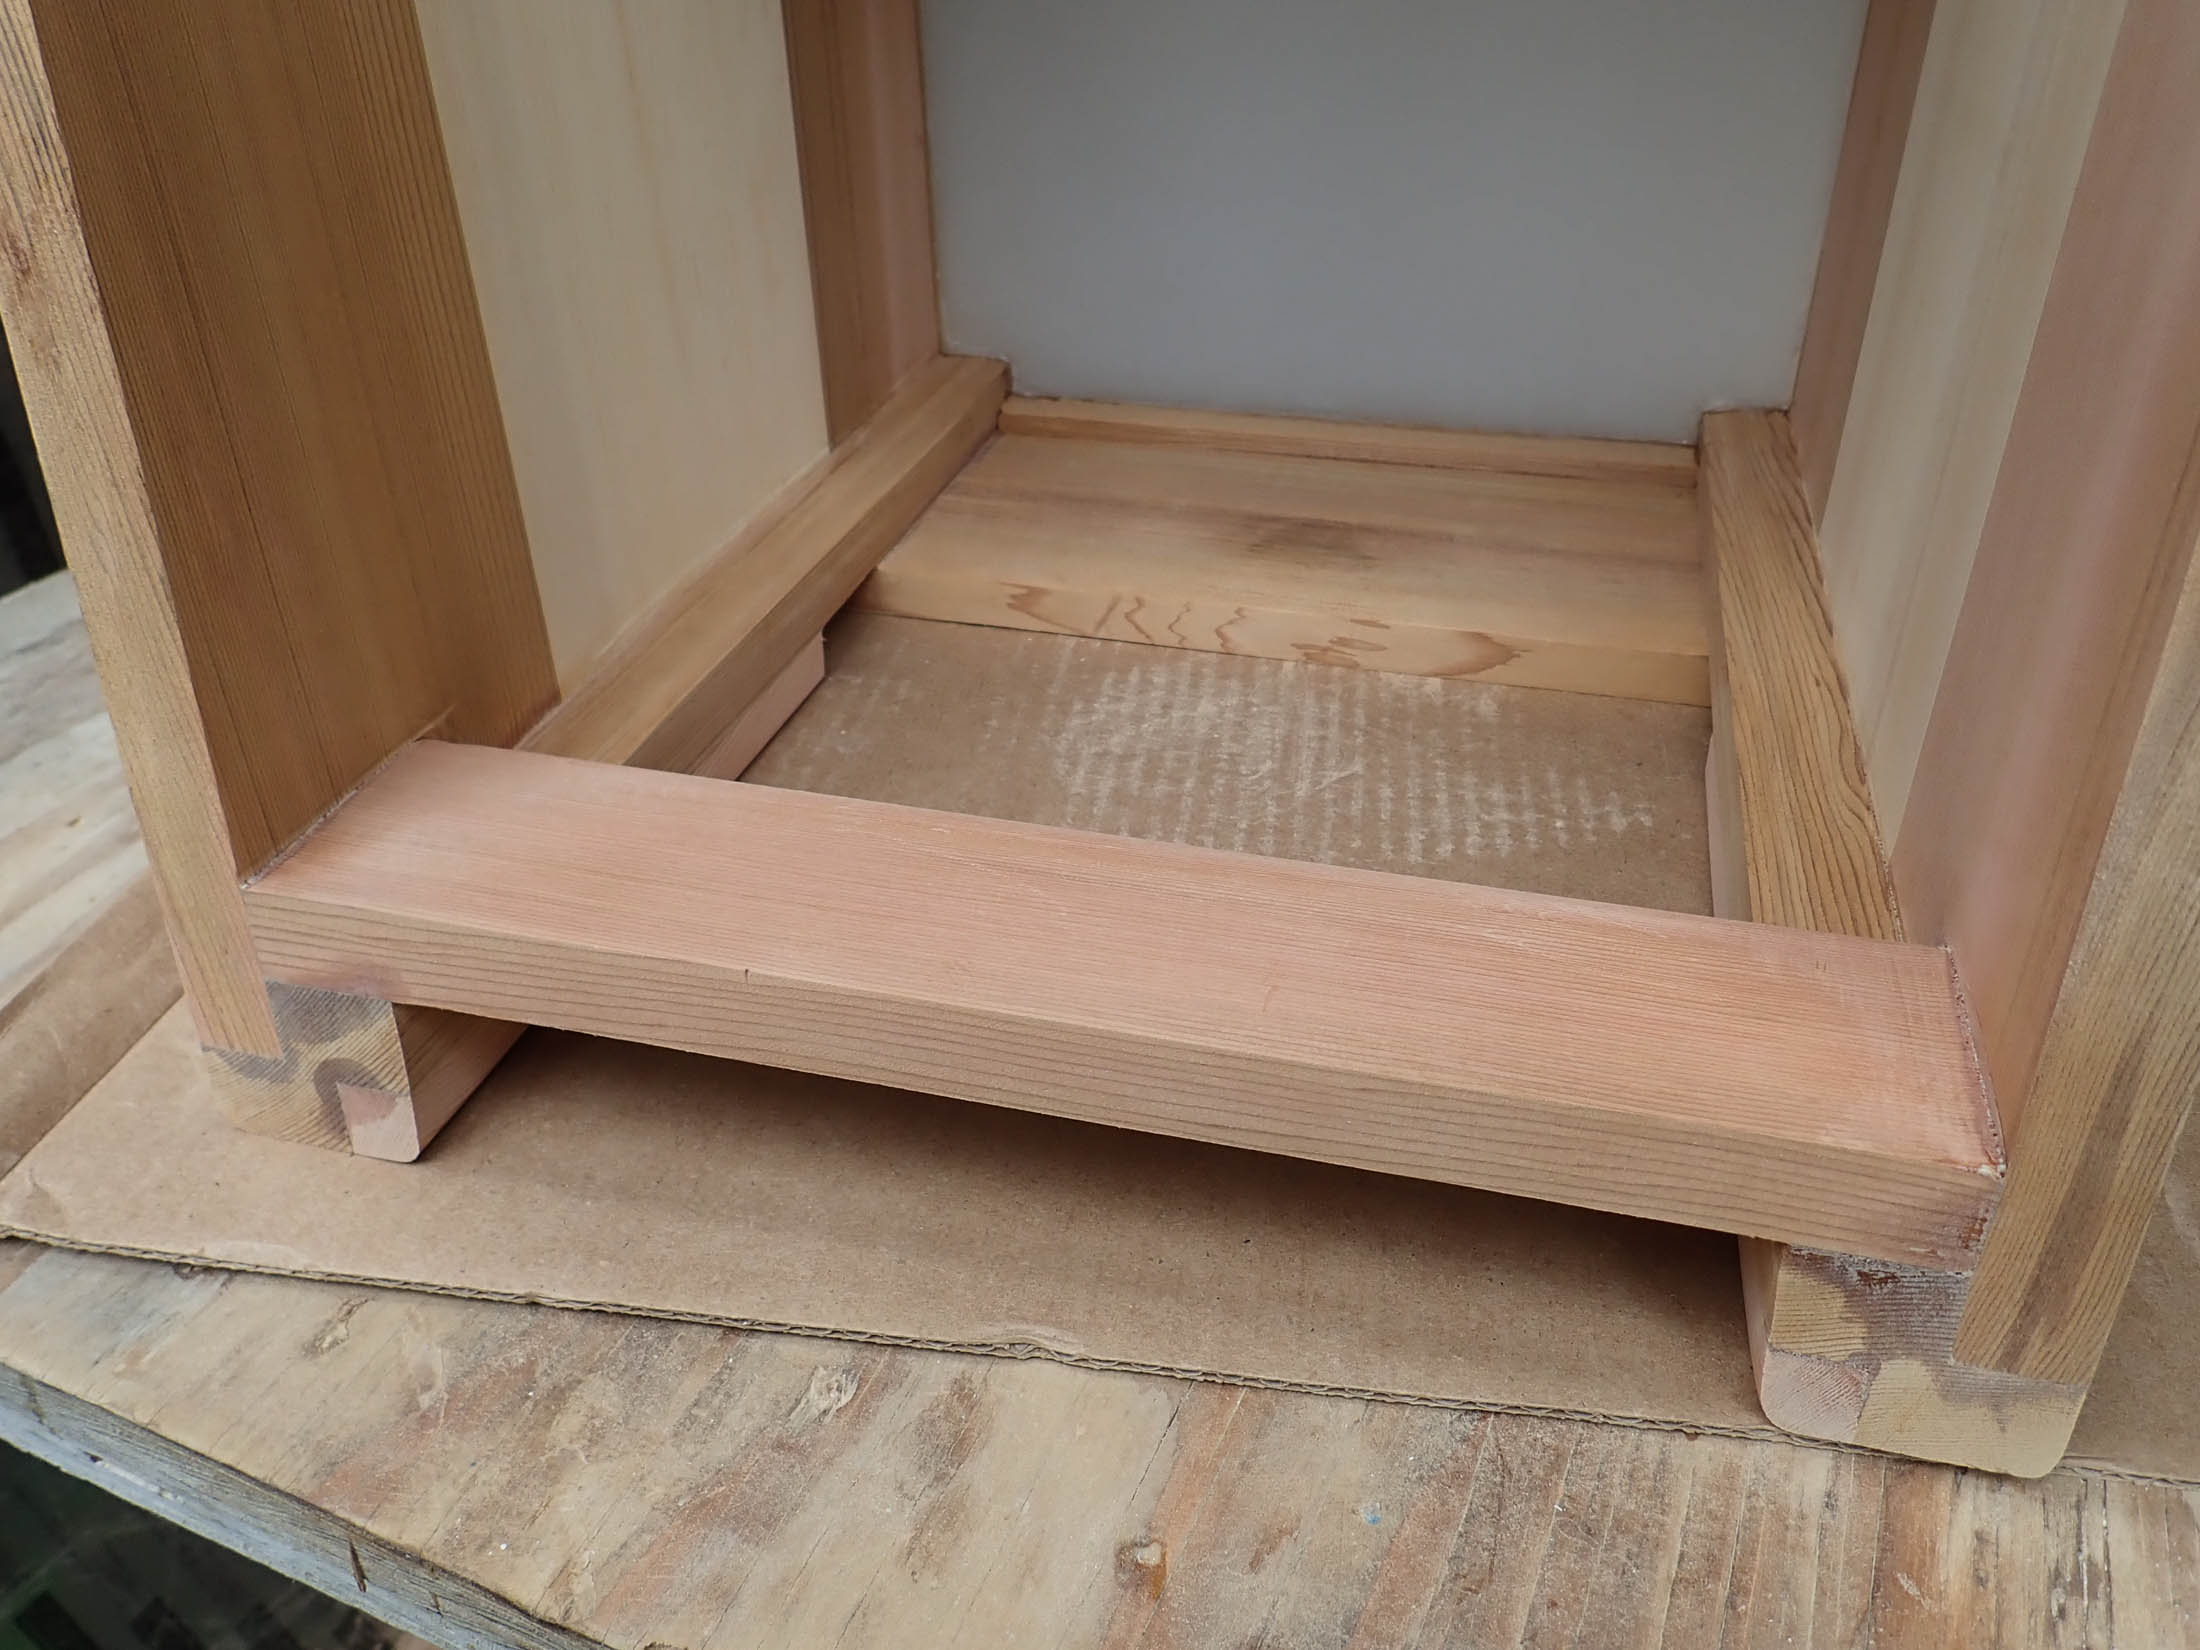
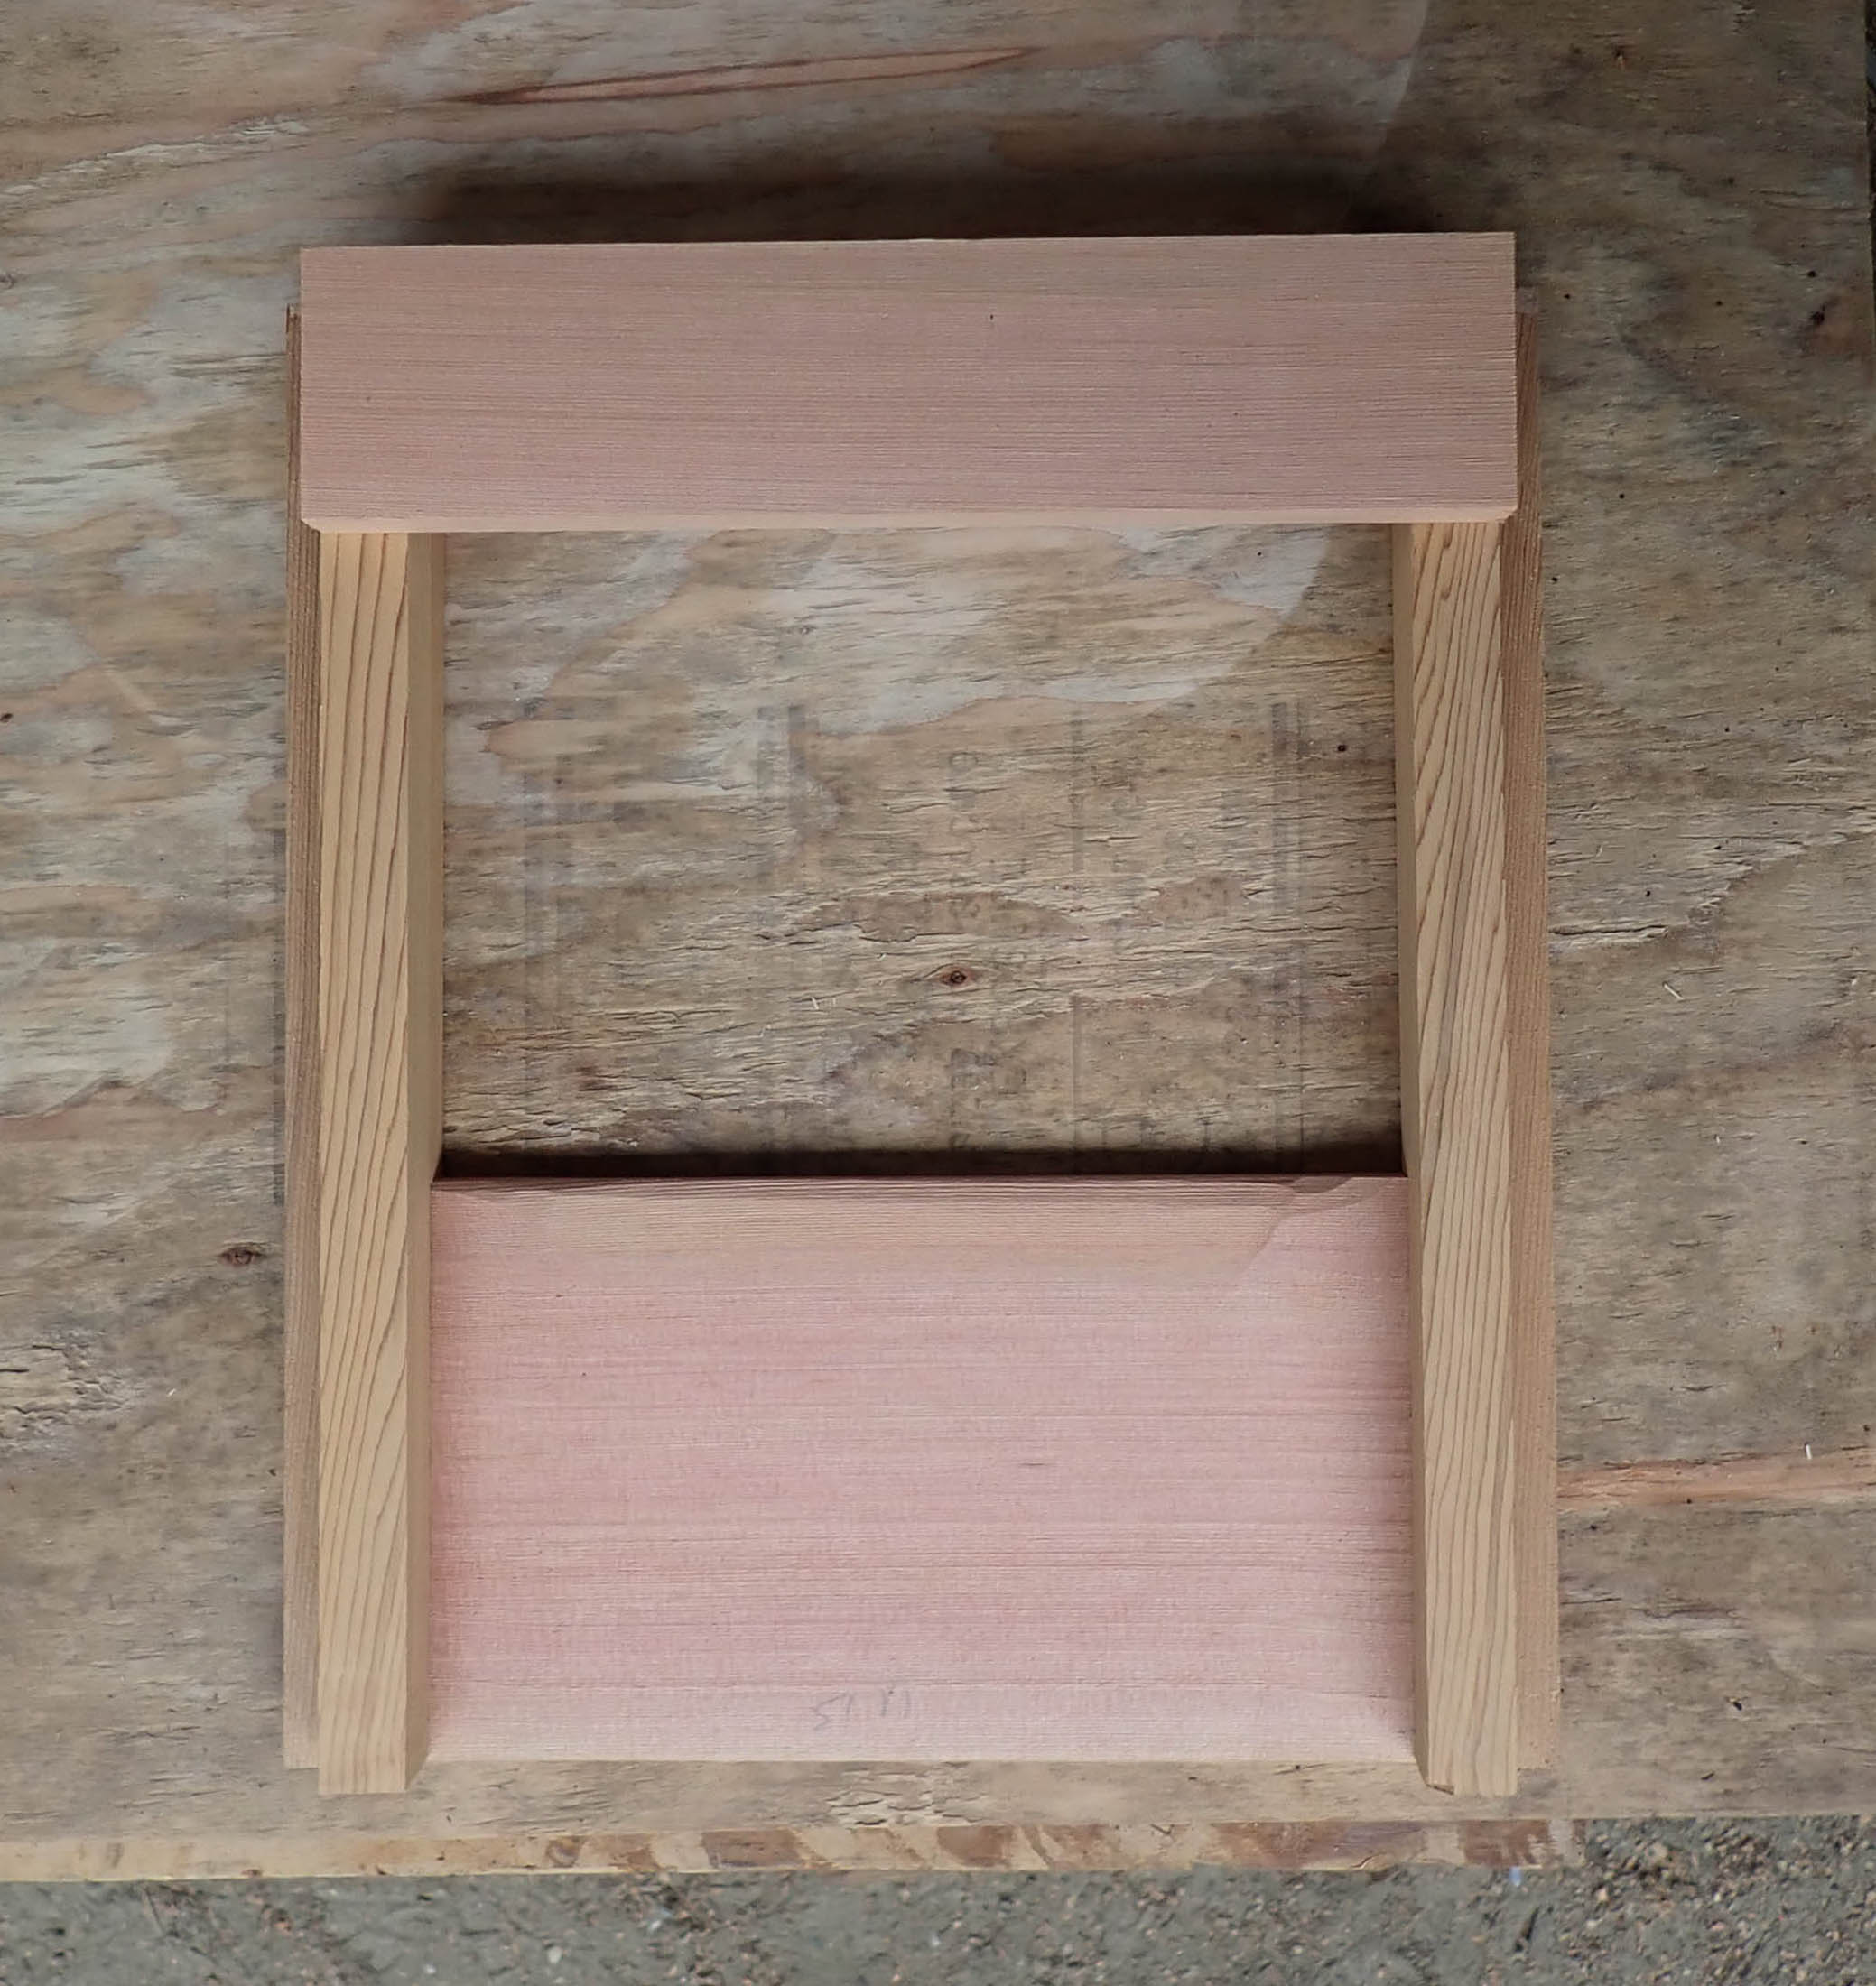
View from the back towards the front showing the left side, the bottom bracket and the bottom back panel. The bottom back panel will be glued to the lower portion of the bottom bracket.Bottom bracket from the back. These channels are easy to rip on a table saw. Or the bottom bracket could be made by gluing 3 separate pieces to produce the same structure.Back plate on the left, bass port bar on the right. I’ve glued a long block in the front portion of the bracket’s lower channel. This reinforces the bracket and give width for the large rubber feet.Back to front view with the bass port bar in place on top of the bracket.Bottom assembly from above. Back is on the bottom of the photo.
I first glue the sides to the bottom bracket, then glue the rest of the box.
Gluing the top, sides and bottom pieces.
There are a lot of possible ways to build the offset sound hole design. Please go wild and post some photos in the comments area.
You can hear 2 cajons with these types of sound holes in the YouTube video below. Note that I use polycarbonate for the backs of all my cajons. So the tone and resonance of these cajons will be quite different than most plywood backed boxes.
Please add your comments below.
For updates and new posts just “Like” the Cajons of the World page in Facebook. And/or bookmark this page.
This method is a fast, easy way to get a tight, fully sealed back attached to your cajon build. It works well with any back material. No clamps are used. Here’s what you need:
camping pad foam material, must be compressible foam of some type, about 1/2 inch (1.3cm) thick
a small amount of hot glue or similar to attach the foam to the back plate
12 small blocks of plywood or wood, (about 4x1x1 inch {10×2.5.2.5 cm} depending on the thickness of your back material)
a drill and screws for screwing down the blocks
some heavy objects to weigh down the box, total about 100 lb (45kg)
If you use epoxy, this method works well even with surfaces that are not quite perfectly flat. Clean-up is minimal. Glancing at the photos below might be enough information to get you going.
In these photos I use polycarbonate for the cajon back but the method is the same for plywood. There’s some polycarbonate specific info at the end of the blog for those of you who want to walk on the wild side.
I cut and sand the back slightly larger than the box by about 1/16 in (1.5mm), then, after it is attached to the box, sand the edges flush.
Foam is hot glued only around the edge of the OUTSIDE surface of the back.
Cut the foam strips to be an 1/8 inch larger than the box side thickness. Usually about 1/2 inch to 1 inch (1.3 cm to 2.5 cm). Use hot glue to attach narrow strips of camping pad foam along the edge of the OUTSIDE surface of the back.
The camping pad foam strips serves two purposes. It prevents the back from moving and it provides a compressible surface to distribute pressure evenly throughout the attachment zone. Do not use a full sheet of camping pad foam, it will cause the back to bow in the center and you won’t have a ‘stretched’ back. Turn the back over, the back goes face down with 6 small blocks offset from the edges. The foam supports the back. It is the only thing supporting the back.
Mask the inside of the back with tape such that the masking comes within about 1/8th inch of the sides.
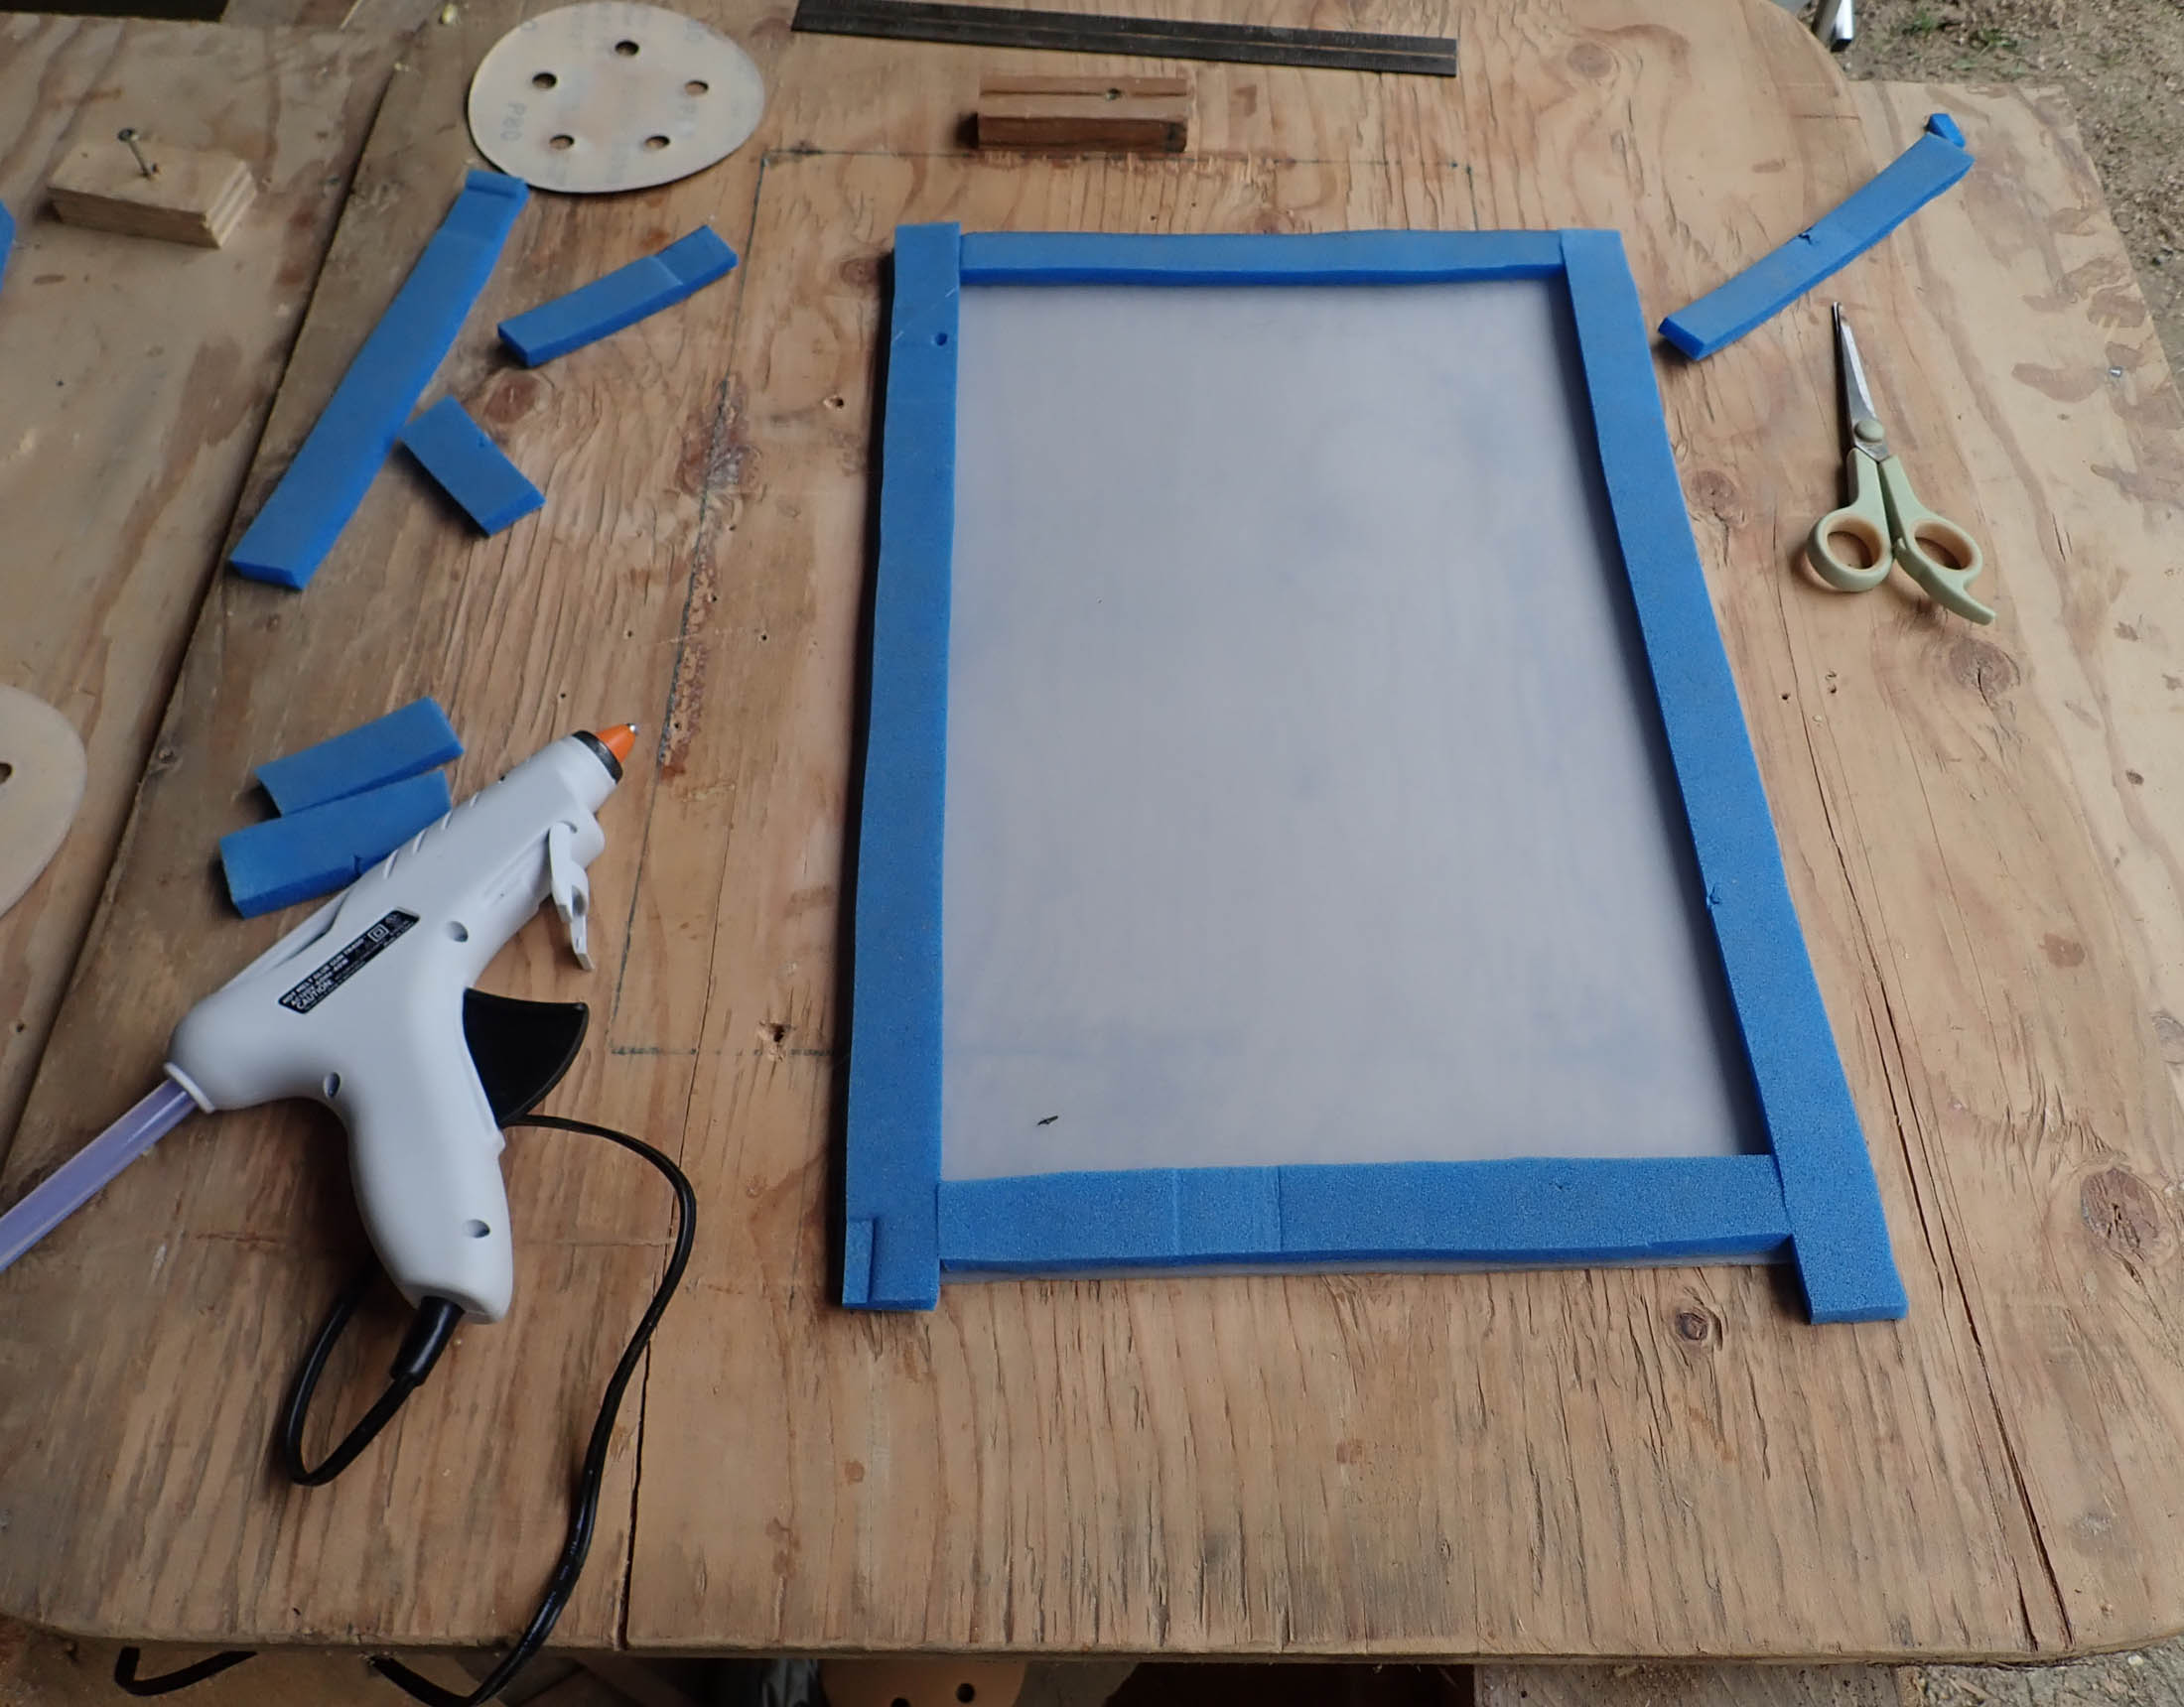
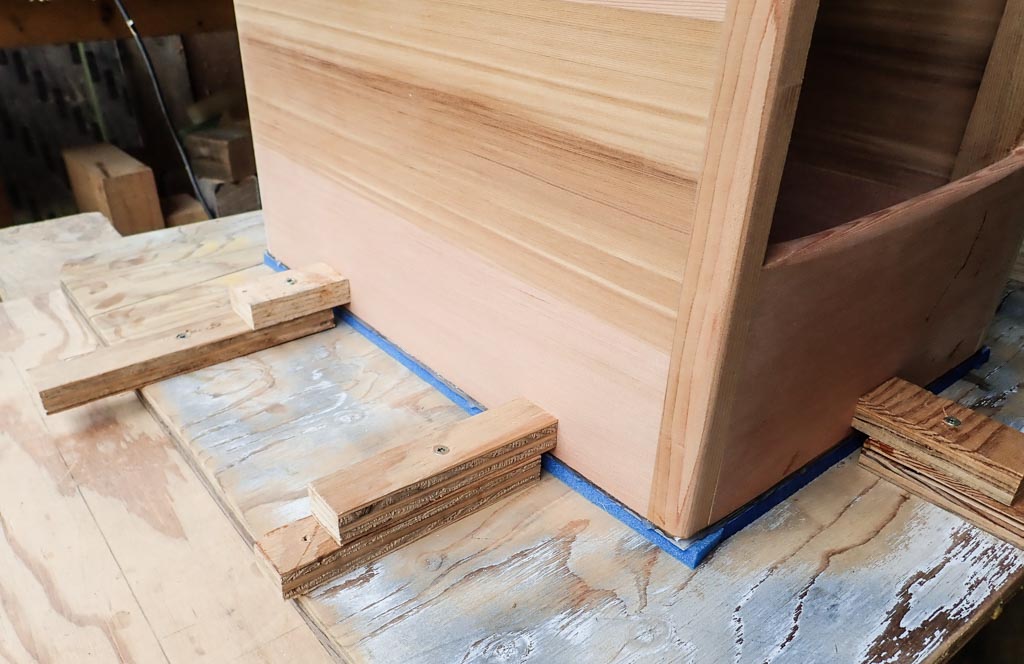
Jig to hold cajon showing the first tier of blocks standing off from the polycarbonate back.
Prepare the jig that will hold the cajon box to the back while the adhesive dries. The first tier of blocks must not touch the edges of the back. Leave them back about 3/8ths inch (1 cm). If you use wood blocks you’ll need to pre-drill holes for the screws or the blocks will split. I prefer plywood blocks. The first tier must be high enough that the second tier never touches the adhesive oozing from the joint.
Put the back in the jig foam down and exactly where it will go during the actual glue up. Carefully put the cajon box exactly on the back where you want it to sit when it is glued. Carefully place and screw down 3 second tier blocks without moving the box, two on one side and one on the top. They should just touch the sides of the cajon. With the 3 second tier blocks screwed down, remove the box.
Jig to hold cajon with 3 blocks having 1st and 2nd tiers of blocks in place.
Prepare your favorite adhesive, in these pictures I’m using clear 2 part epoxy but for a wooden back I’d probably use Titebond III (not hot glue, that’s just for the foam to back temporary bond). I usually take the back out of the jig to put the adhesive on.
Apply a layer of adhesive to the edges of the back. This back does not have masking around the inside edge and will require a lot more clean up than a back with masking.
Put the adhesive on the back around the edge where the box will be attached. Once your adhesive is on, put the back in the jig and make sure the back is perfectly lined up with the appropriate 3 second tier blocks. Turn the box over and carefully place it exactly on the back, with the appropriate side and top against the second tier blocks.
For 5 to 10 seconds, slowly press the box down while slightly shifting its position to spread the adhesive evenly. End with the box pressed tightly against the 3 second tier blocks.
Place about 1/3rd of the weights on the box to keep it stationary. Place and screw down the remaining second tier of blocks. They should be snug against sides. After they are in place the box should not move at all.
The lower tier of blocks is offset so as to not contact the adhesive. The upper tier of blocks hold the cajon box in place.The box and back with the lower and upper tiers of blocks in place.
Once all the blocks are in place add the remaining weight. I use a lot of weight. Some of my early attempts with less weight were less successful.
Weighing down the box. These are sitka spruce blocks which are fairly light. Total weight is about 110 lbs (50kg)
With the weights in place, reach inside the box, through the sound hole and remove the masking tape. If necessary scrape out the access adhesive that oozes from the joint. Then wipe the area with the appropriate solvent. The more excess adhesive you can remove the easier clean up will be after it has set.
Next day remove the weight and sand the edge to make the back flush. If necessary sand the inside of the back to remove residual adhesive.
The edge of the back sanded flush with the sides and top of the cajon.
A tight box is critical for good sound and durable construction. While building my first cajons I used clamps to attach the back. They worked but it was messy and a bit complicated. I’m sure there are other ways to do this. And plenty of improvements are possible to this method. Please comment below. Thanks, Bill
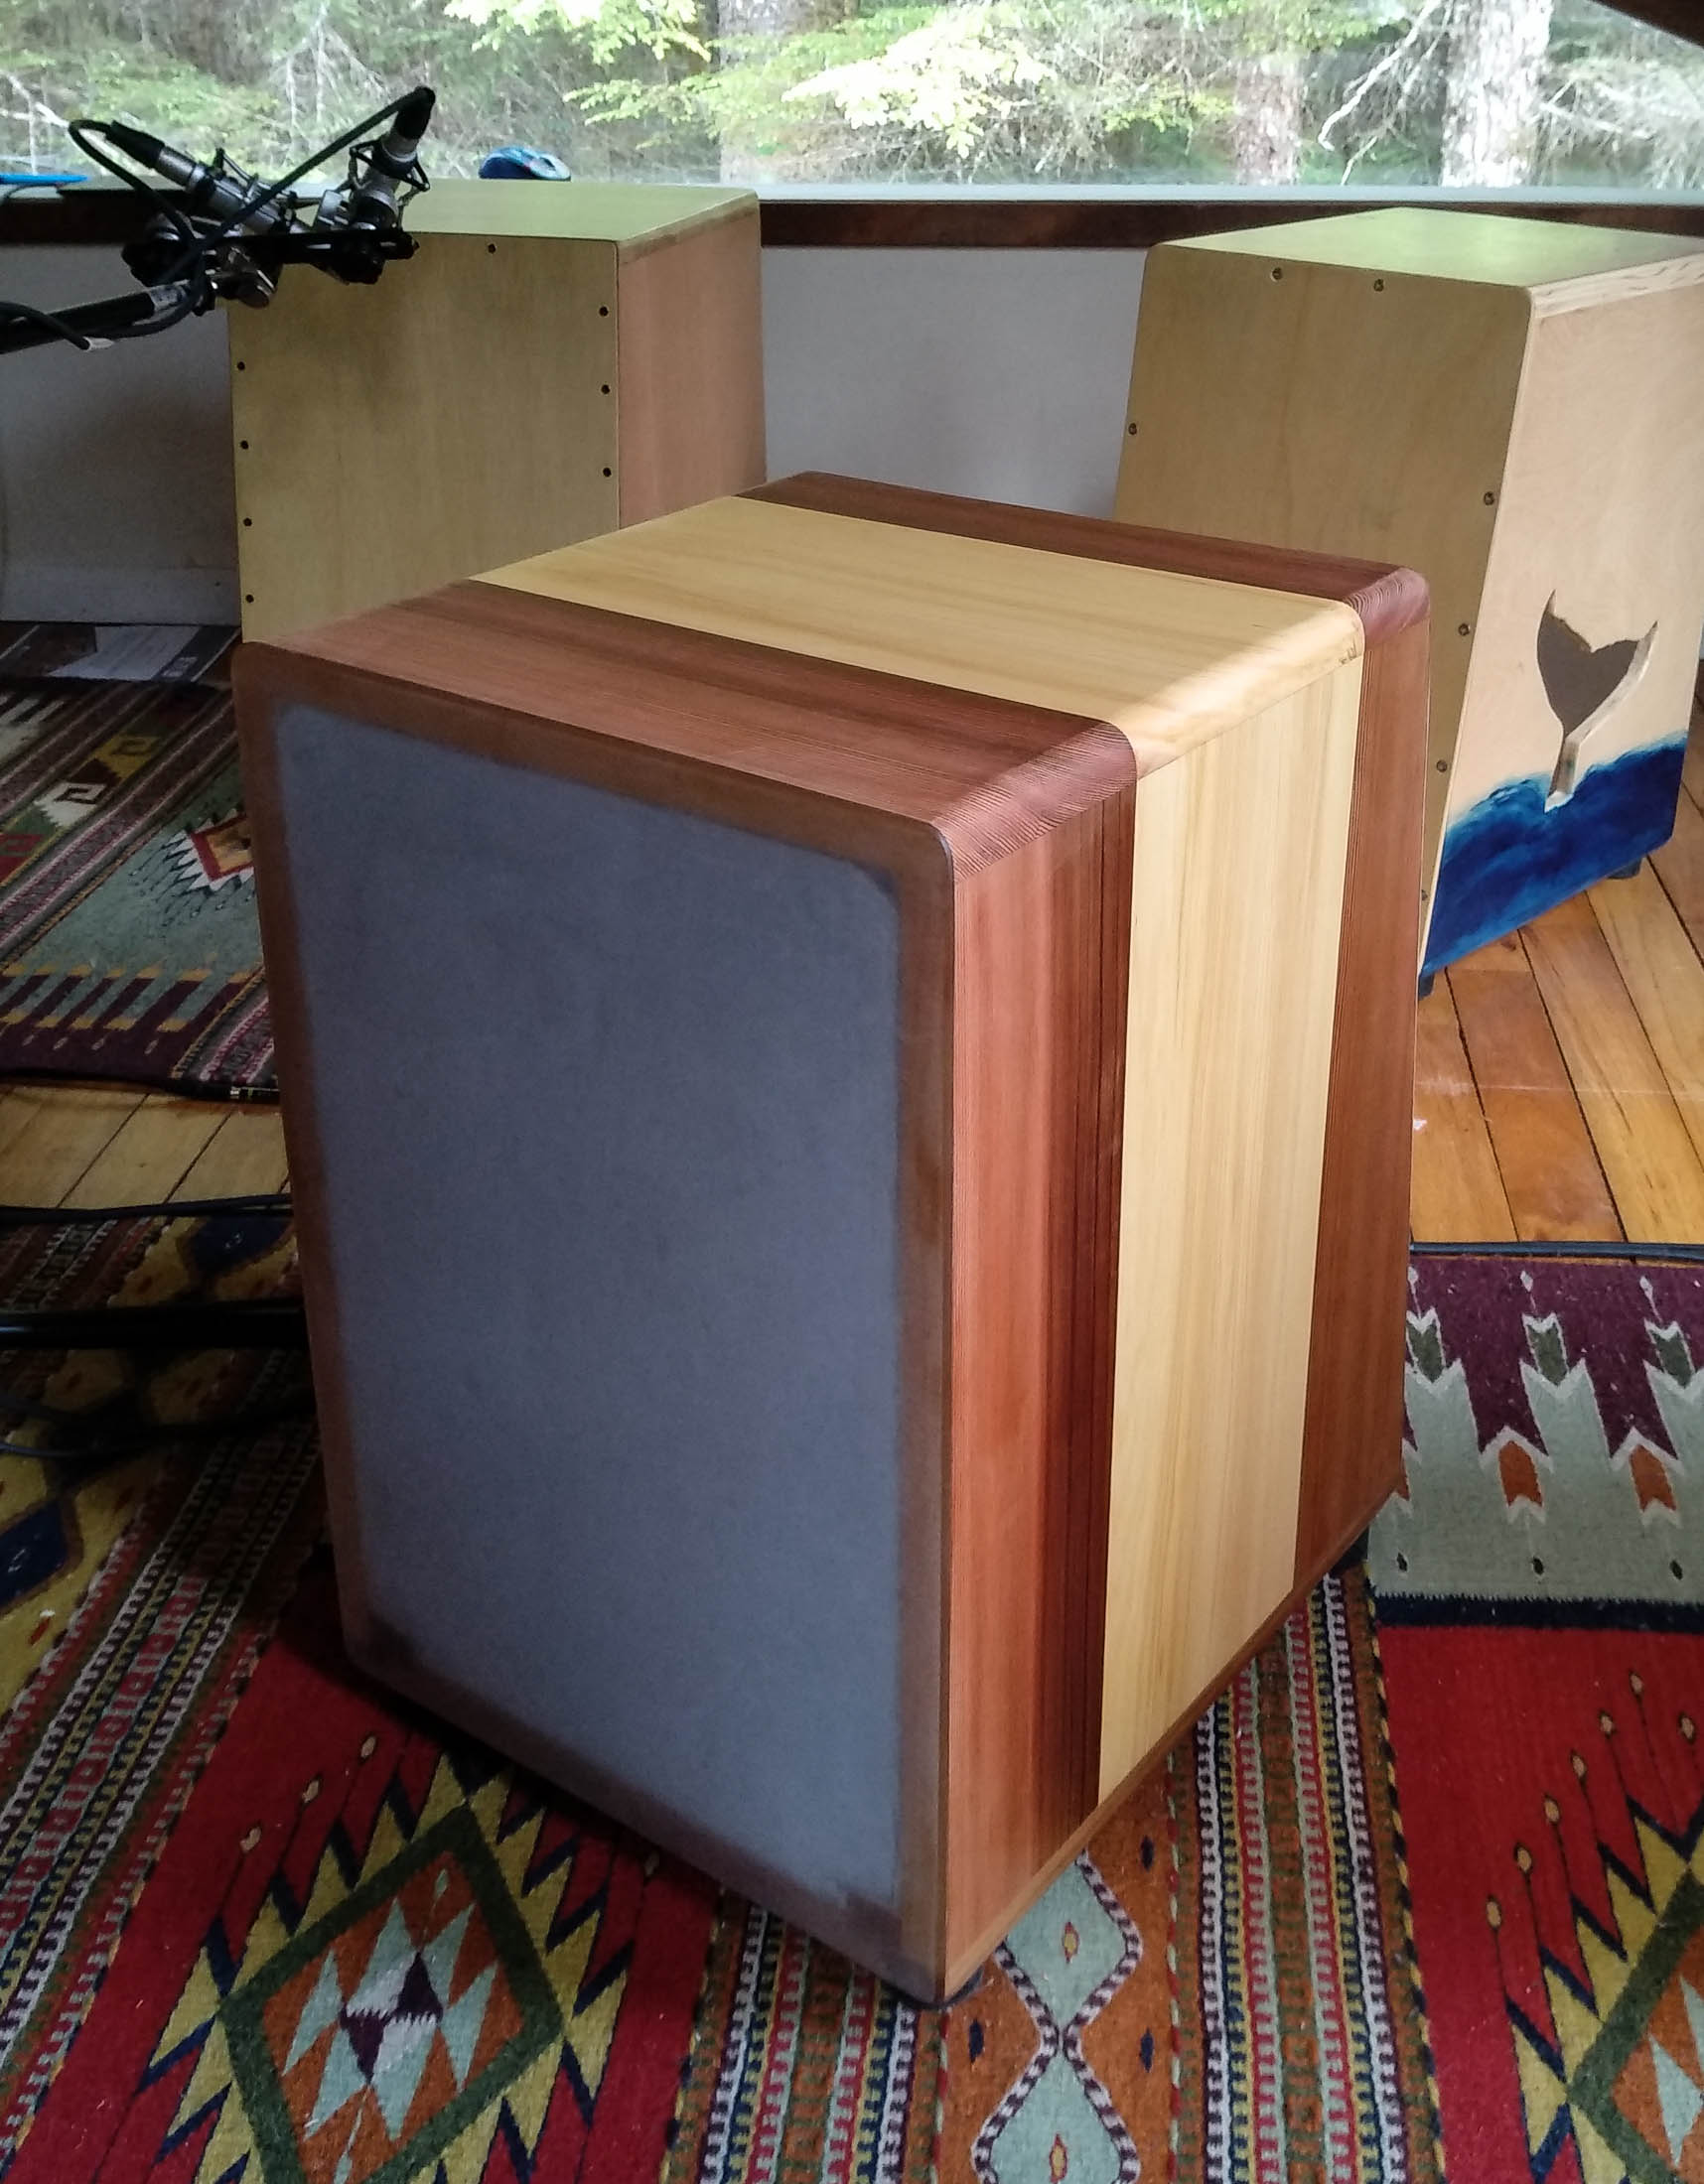
Firebox Cajon with polycarbonate back, red cedar and yellow cedar sides, top and bottom. Made in Alaska, USAFirebox Cajon with luaan tapa, red cedar and yellow cedar sides, top and bottom. Tung oil finish. Made in Alaska, USA
Attaching polycarbonate as a cajon back:
Polycarbonate gives a cajon a lot of resonance. I cut the poly with a ‘ceramics’ blade on a jig saw which is much, much safer than other methods I’ve tried. Then I sand both sides to ‘frost’ the sheet with either a belt sander or an orbital sander. After cleaning the inside edges with alcohol the polycarbonate it is ready for ‘gluing’ with either 2 part epoxy or AquaSeal as the adhesive. Critical is an epoxy that is not runny. It needs to be a bit thick to fill and adhere. If you are using epoxy you must work fast to coat polycarbonate and position the box before the epoxy starts to set. Any end grain must be sealed with a thin layer of epoxy the day before glue up. Many epoxies are heat soluble, if you make a cajon with an epoxied back don’t let it get to hot. And it’s a good idea to put a few screws in to help ensure it stays put.