I guy came up to me on the street the other day and tried to buy my cajon. A few days earlier another fellow told me it was the best cajon he’d ever heard. Last night a traveling street musician wanted a YouTube link he could send to his cajon builder friends in Argentina. Most folks on the planet don’t have much experience with cajons, but I was busking in Montañita Ecuador, a haven for world travelers looking for a little quality beach time. So there’s perhaps a higher percentage of folks passing through that actually know what a cajon is.
Cajons made in Buenos Aires Argentina: JC Percusion ; Alexander Percussion; tierrapiano and Skull Percussion
All total I’ve played about 36 brands of cajon, which is not very many when you consider there are over 350 cajon makers on the planet, 50 in the USA alone. Any website that claims to have objectively sampled them all is probably BS’ing you. I’ve played all the common ‘Made in Thailand/China’ cajon brands sold in most music stores. I own a wonderful cajon made in Germany. I’ve got a start on a collection of South American cajon models. And I’ve played every locally made brand I could find in Colombia, Ecuador, Peru, Argentina, Chile and the Philippines.
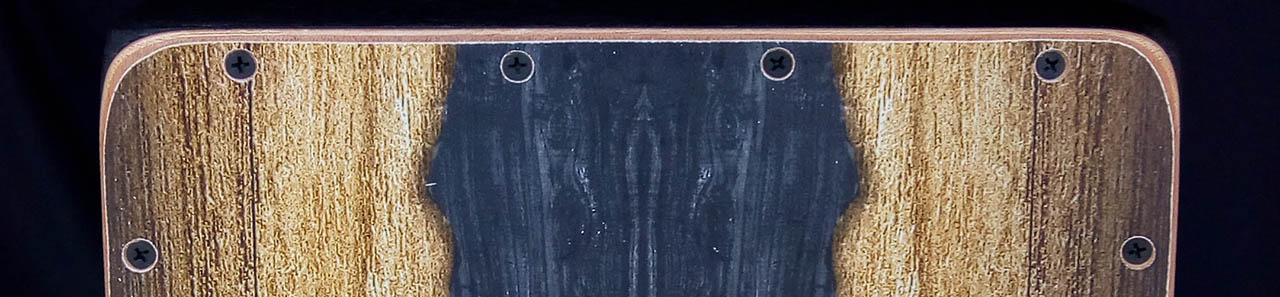
Outstanding JC Percussion cajon made in Bogota, Colombia
But this is a drop in the bucket, there are so many great cajons made in Japan, Australia, Poland, Russia, Spain, and many other countries. We recently had a discussion in the “Play Cajon” forum about the best sounding cajon in the world. Perhaps we should have re-titled it “the best sounding cajon sold in music stores” because while there were a few regional brands mentioned, over and over the recommendations were factory made cajons from a few global manufacturers.
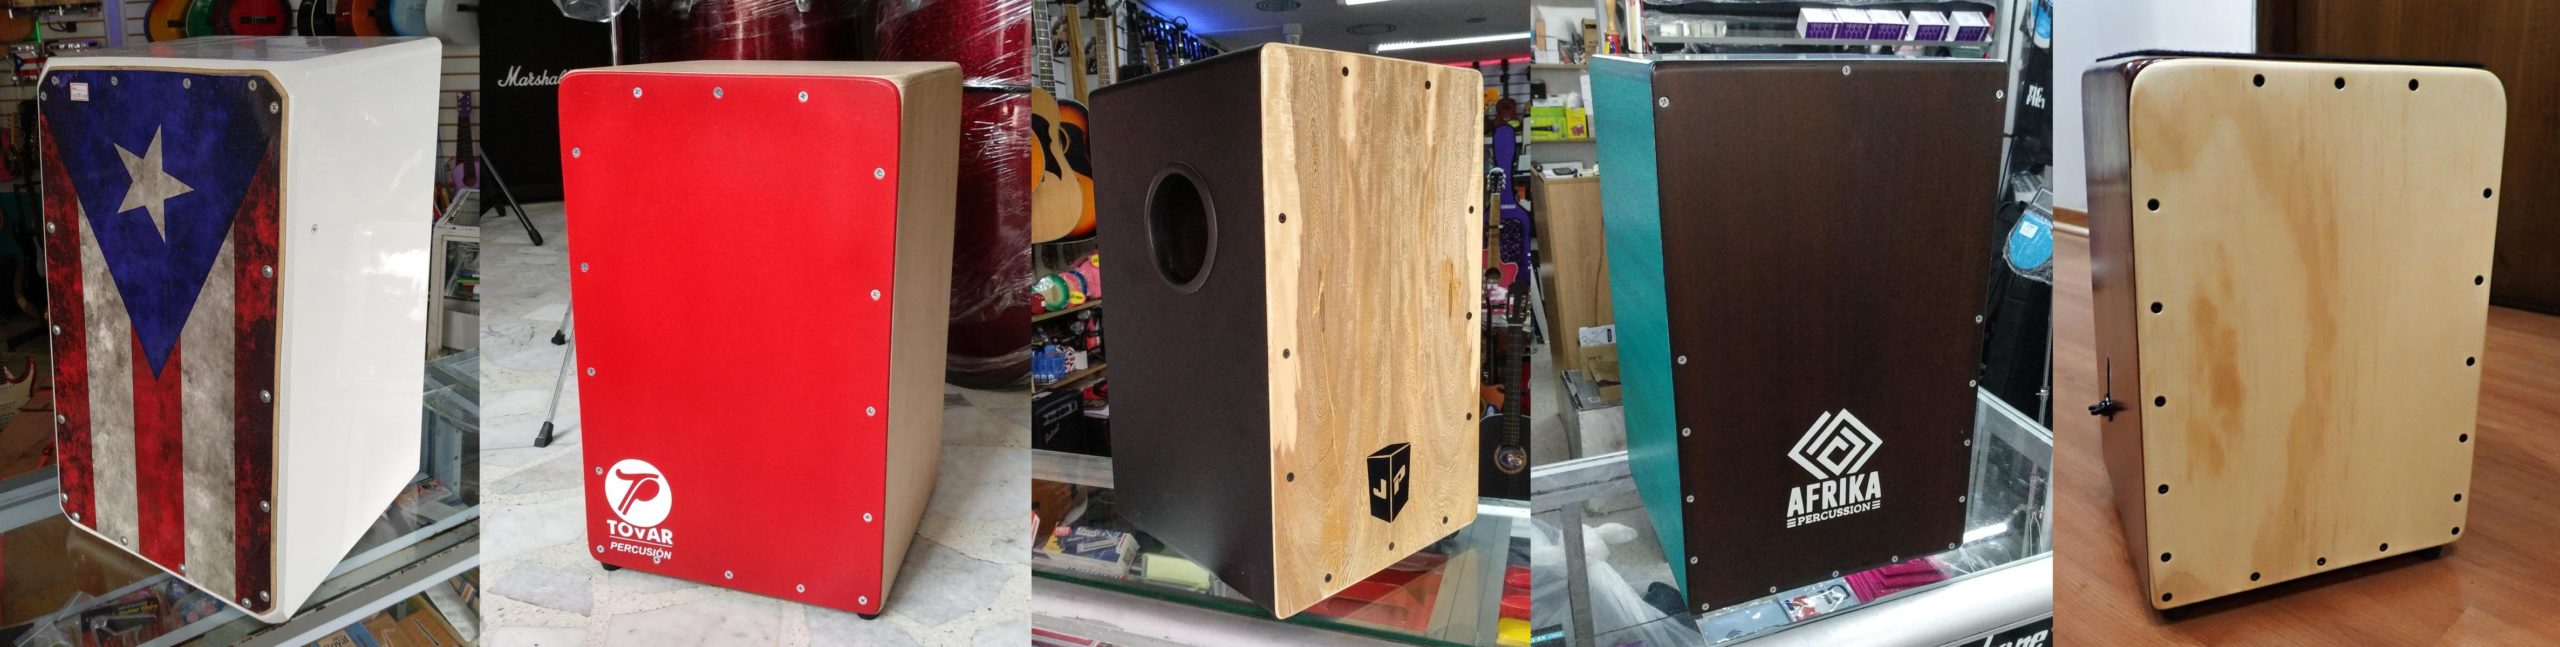
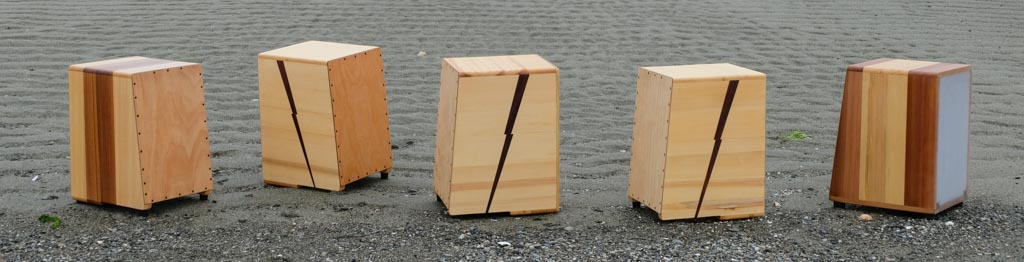
Five cajons made in Latin America: Right most is a music store cajon from Cali; Tovar Percussion in Bogota; JP Percussion from Popayan, Colombia, Afrika Percussion from Colombia and a music store cajon in Santiago de Chile.
Of the cajons I have played, I can’t really say which brand is ‘best’. Most cajon makers have several models. The high end models are usually very, very good. But many of the low end models are simple and basic. It’s understandable. Basic models costing as little as $30 are affordable to almost anyone. Sometimes I’ve been able to play and record the high end models, sometimes not.
A great sounding, professional A&P Cajon made in Colombia near Cali
Another thing, cajons are different, no two alike. For many people the sound is almost personal and specific. It’s like asking which guitar is best, a Les Paul or a Gretsch? I may love the tone of one and you might prefer the one next to it. We are both right. Some people like a lot of snare, some people want none. Some cajons have a ‘dead’ space at the seat that makes ghost notes easier, some do not. Some people prefer the flat, clean boom produced by a thick back, some want the resonance of a thin back. And some cajons sound better when accompanying music of a certain key or style, which should be a blog unto it’s own.
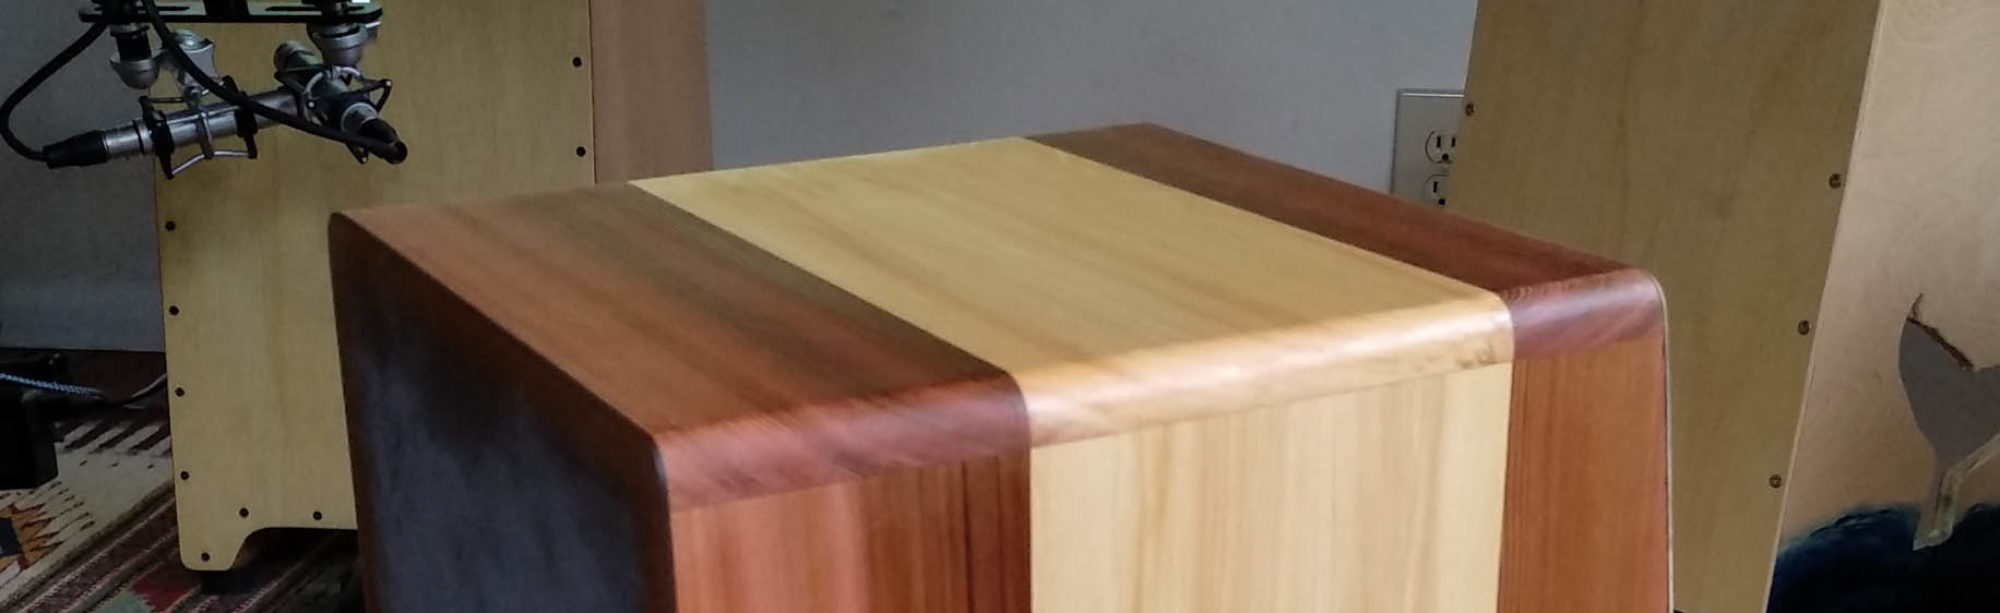
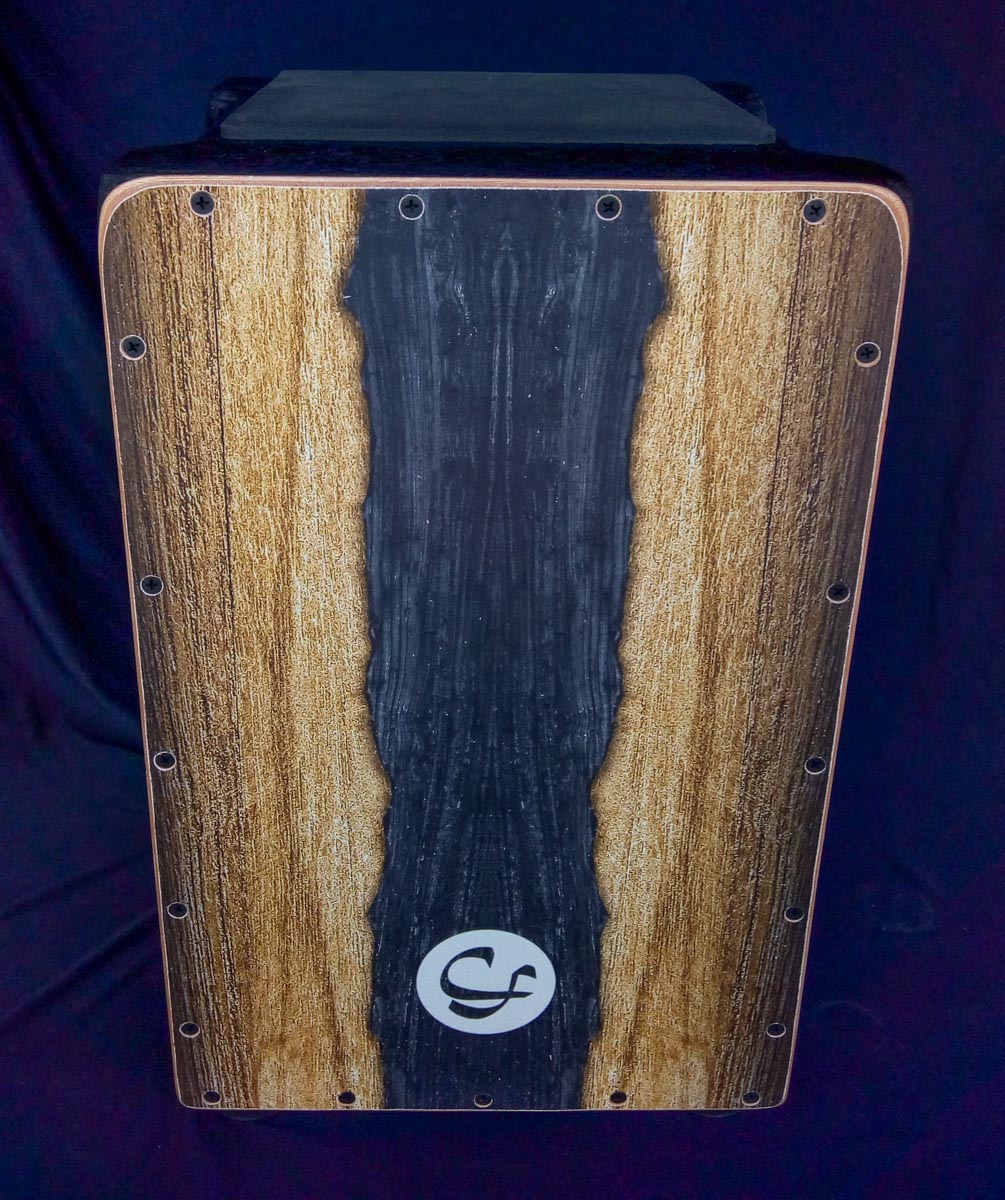
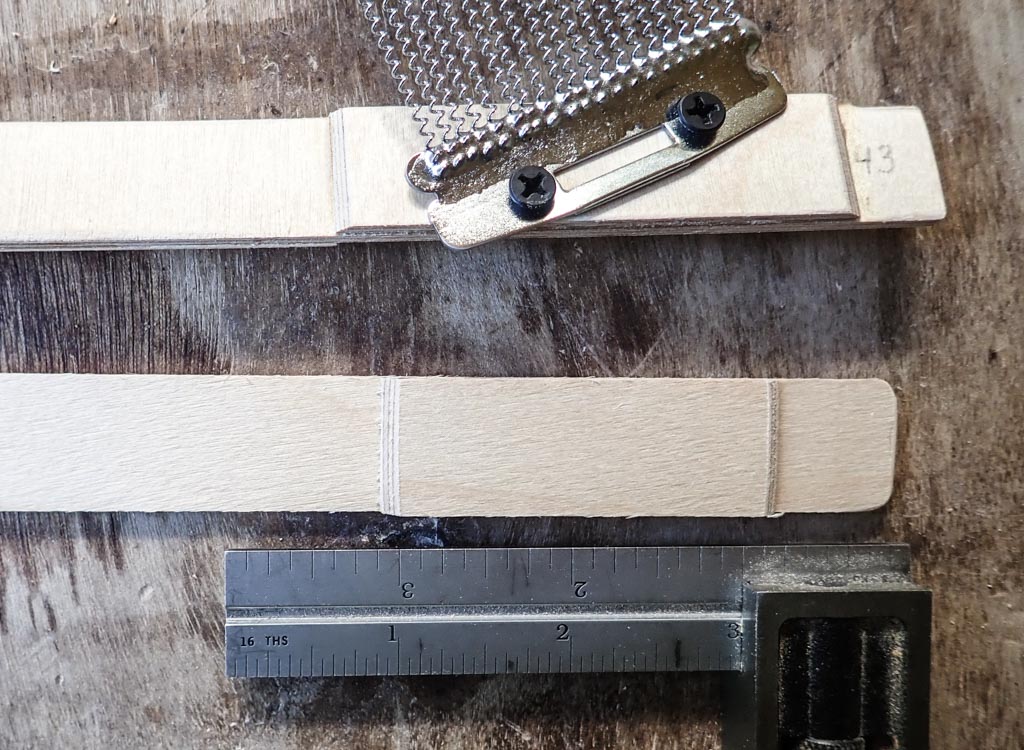
Firebox Cajon #43, solid wood cajon
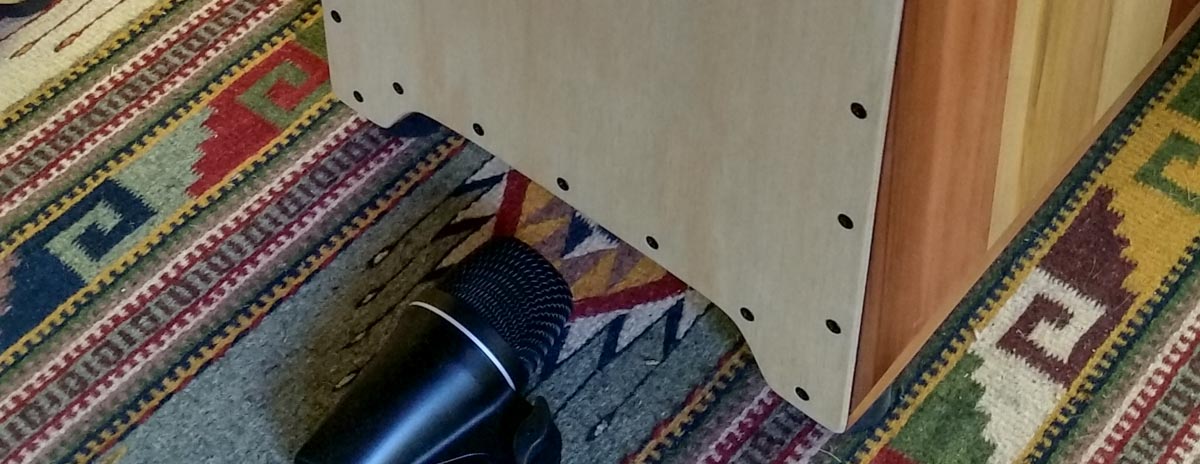
Mostly I play my current build, number 43, completed at the end of the Alaskan summer of 2019 in the shed outside my house. It’s got the sound hole on the bottom, the sides are Sitka spruce, western red cedar and yellow cedar. The top is yellow cedar. It is perfect for busking, the sound hole on the bottom directs the sound forward. The back is polycarbonate and it has my new angled, flexible snare system which is great for flamenco or rock. It’s the cajon I’m hauling around Ecuador and it gets a lot of attention.
VP Cajon made in Lima Peru with great sound, for some songs I prefer this to #43
I have played cajons with cleaner bass, and some with lower bass. And many high end cajons look nicer. #43 is a very good cajon, certainly not the best in the world, but good enough to impress and keep me happy. While it is flattering that many world travelers in Montañita really like this cajon, their opinions are subject to the same limited experience that we all have: they’ve only heard a very small percentage of all cajon brands.
An awesome cajon by Cajon Fly made in Medellin Colombia
I’m no wood whisperer, yet I was able to make a great sounding cajon. Building a good cajon is a doable project for most wood workers who have a basic wood shop, patience and a penchant for detail. Local cajon makers who have built hundreds of cajons are often making great sounding, quality instruments at reasonable prices.
Cajon with Puerto Rica flag made in Colombia
If you’d like a cajon similar to #43 please contact a local cajon maker and give them the links in the paragraph up above. The construction information is all there. And I’d be happy to answer questions. But before you have them duplicate these plans, please try one of their cajons, chances are you’ll find a winner.
Beautiful Flamentr3lok cajons made in Chile
Well that’s it, in your search for the best cajon in your world, please start with a local cajon maker. “Try before you buy” is nice but if you must, throw caution to the wind and just get one.
Marvelous solid wood JA Cajon made in the Philippines
In the next few weeks I’m going to start a page on the Cajons of the World site devoted cajon construction. Stay tuned. If you would rather just buy a great locally made cajon right now here are links to your local cajon makers:
The ‘batter head’ is the part of a drum you hit. If the drum has a vibrating head opposite the batter head it is called the ‘resonant head’. Not all drums have resonant heads, conga drums and bongo drums for example do not have a resonant head. Some drums such as marching band bass drums and bata drums, have two batter heads, which also act as resonant heads. The cajon’s batter head is called the tapa. Some cajons have thick, stiff backs that are not designed to vibrate, others have thinner backs which vibrate and create resonate. The back of a cajon which is intended to vibrate and produce resonance could be consider to be a ‘resonant head’. There are a few cajon models that have two batter heads – the ‘back’ is thin plywood, usually a little thicker than the primary tapa, and is designed to be played.
Polycarbonate cajon back as a resonant head.
Many commercial cajons have thin plywood backs, some slightly thinner than 5mm. Some thin backs even seem to be impregnated with plastic or flexible epoxy, simulating a stiff drum skin. Some are attached very tightly, almost as if the manufacture found a way to stretch the wood across the back. These cajons have more resonance than cajons with thick backs. To the manufacturers benefit these cajons also weigh less, hence are cheaper to ship in bulk resulting in less carbon burden.
Inside a cajon with a resonant head made from polycarbonate and attached with epoxy and screws
Unlike drum kit drums, the back of the cajon is important structurally. The back provides support to the sides, at least under lateral pressures. A cajon with a membranous drum head on the back would need to have thicker sides with extreme corner bracing to be structurally stable. Or it would need some sort of reinforced edging around the back. Some cajon manufactures have used a typical circular drum kit head system inserted in to a solid plywood back to simulate a resonant head on a cajon, but this is costly and rare.
Clean edge between wood and polycarbonate when 2-part epoxy is used. Edges sanded clean.
I’ve built about 40 cajons using polycarbonate for the cajon back. I consider these to be cajons with resonant heads, perhaps the most resonant heads found on any cajon. Polycarbonate is very strong, it is typically found in the face shields of motorcycle helmets. It has excellent lateral strength but when flat sheets are attached along the edges, it readily vibrates in the center. Used as the back of a cajon it provides significant lateral support and significant resonance. Unlike a membranous head, polycarbonate does not need to be stretched to produce resonance. Some of my cajons are made from solid softwood and have slightly shrunk over time. The polycarbonate heads are slightly buckled but continue to produce about the same amount of resonance as they did when the cajon was new.
Solid wood cajon with polycarbonate back held on with only 2-part epoxy. I now add screws to reinforce the epoxy joint.
Polycarbonate is not the same as ‘acrylic’. Acrylics have much less strength and can shatter. I would never use acrylic on a cajon back.
Attaching polycarbonate to the edges of a wooden cajon is an issue, you can not simply glue it. Most glues do not adhere to polycarbonate. I’ve been using two part epoxy and screws. This last summer I tried a few other methods hoping to find a simpler method. I tried a variety of double sided tapes and screws. I didn’t like any of them. The tapes gave inconsistent visual results and unless you use a lot of screws, the tape actually seems to slightly mute the polycarbonate.
Polycarbonate attached with 32 screws, no epoxy or tape.
The simplest method with acceptable visual results was to simply use a lot of screws to attach the polycarbonate, no tape, no epoxy. But this is tedious, the polycarbonate is tough and drilling 32 holes and counter sinks is time consuming. Plus the results around the edge are not as visually appealing as an epoxy edge.
Cajon with a polycarbonate back attached with only screws. The polycarbonate is slightly buckled between screws. More screws are needed on this cajón. If the back was also attached with epoxy this would be the correct number of screws.
So I spent part of the summer of 2019 trying to simplify attaching a polycarbonate back to a cajon using 2-part epoxy and screws. I’ve updated a previous blog with the most recent methods. It is more efficient than the previous version and is the result of 5 years working with cajons with polycarbonate backs.
32 screws used to hold the polycarbonate without epoxy.
Tapes used between polycarbonate and cajon body-not recommended .
Irregular tape at corners
Using tape between wood and polycarbonate. Tape becomes ragged at corners.
Polycarbonate attached with clear tape and screws.
I’ve been building cajons with “sound holes on the bottom” for 2 years and finally decided it was time to fit a few with a snare mechanism. I wanted to keep it simple and I wanted something that doesn’t require a hole in the side of the cajon box. On my cajons this is a super easy mechanism to take in and out. On a cajon with a normal sound hole it would take a bit of practice but would certainly be doable.
There are two common kinds of snares on cajons, those that use guitar strings, flamenco cajons, and those that use the same snare wires found on snare drums. There are many snare wire holder designs used in cajons with snare wires. Some have rigid stationary bars to hold the snare wires, some have rigid rotating bars or dowels that allow on-off and some cajons have rigid but removable bars.
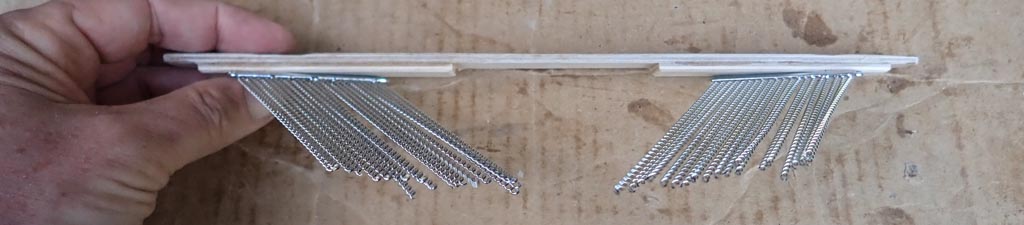
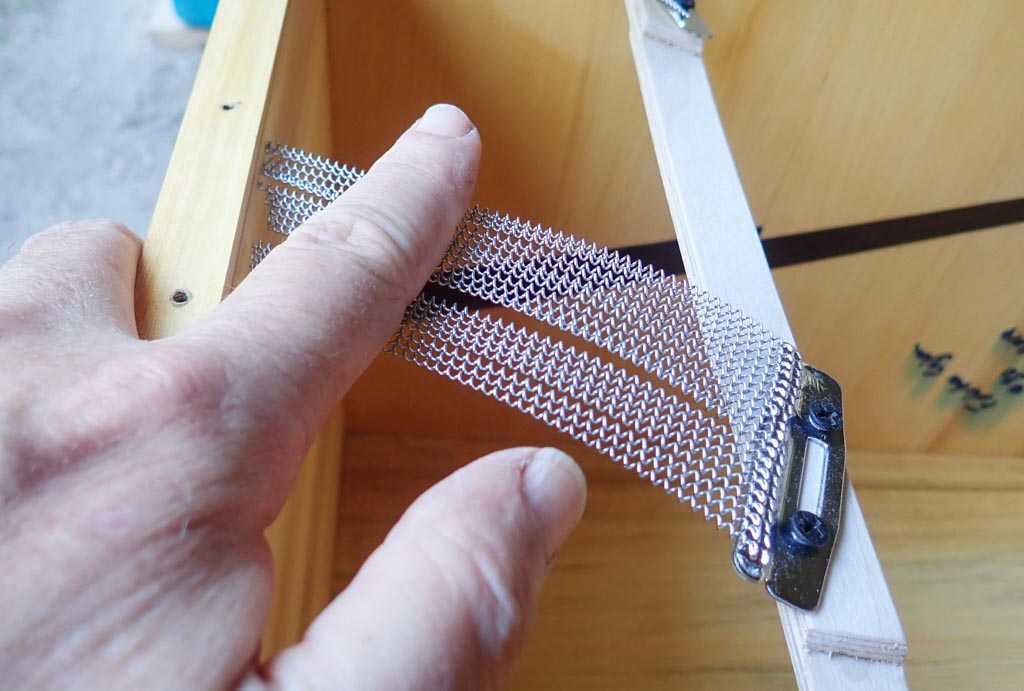
Flexible cajon snare mechanism in place
This design is based on snare wires but it works because the wires are angled and held in place by a thin flexible bar that helps to press the wires onto the surface of the tapa. The design gives good snare, clear bass and is easy to remove. A disadvantage is it can not be removed while playing, you must reach into the cajon to add it or remove it.
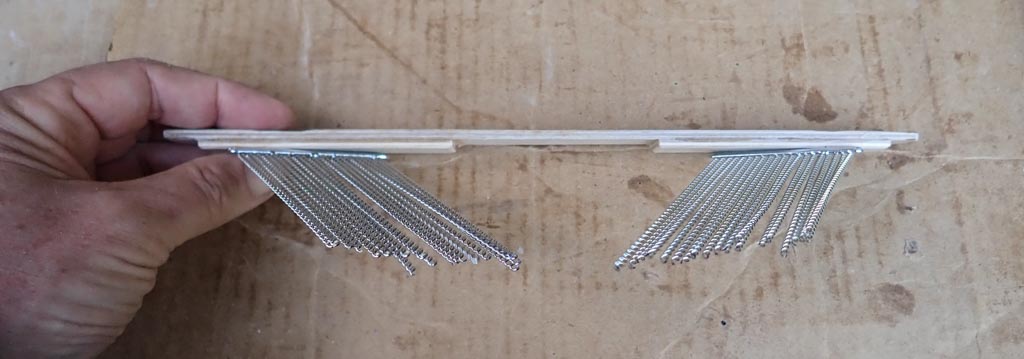
Flexible mounting bar with angled snare wires.
Angled Snare Wire Orientation
The wires themselves have three important angles, one is the positioning of the wire mount on the bar to angle the wires towards the center of the cajon. The second is the cut off end of the wires, it progressively lengths such that all the wires end at the seat of the cajon, towards the center. I like to make the device then cut the wires so they just touch the seat. Because of these 2 angles the wires are not held tight by the seat. A direct hit over the wires results in a good snare but a hit to the side has much less snare. Contact with the seat causes a slight muting if the hit is high in the middle against the seat. I like this as I am constantly looking for different tones and this provides two distinct tones in close proximity.
The main advantage of the angled wires touching the top is that the snare sound is good in the upper center, but minimal to the side and minimal in the bass.
I bend the wires out from the base of the metal snare wire mounting bracket. They must be mounted on the wooded bar to maximize the angle toward the tapa. In the cajon the tapa would be vertical at the bottom of this photo.
The third important angle keeps the snare wires pressed tightly against the tapa. It is achieved by both the inclination of the wires on the bar and the inclination of the bar on the bracket. I usually bend the wires where they attach to the metal bracket that holds them all together. The wires must be mounted such that the angle to the tapa is maximized. If you mount them on the other side such that they are flush with the tapa, the tension may in insufficient and the mechanism may fall out.
Flexible Bar
The flexible bar is a piece of thin 3mm tapa plywood cut narrow, about 19 mm and just long enough to fit between the sides. I am still experimenting with the best position but in my current favorite build the bottom of the bar is 11 cm below the bottom of the top. In some of these photos I’ve add three pieces to give the screws wood depth and change the flexibility, but I’ve also used two or even none. Even with a piece to thicken for wood depth, the screws poke through and should be ground flush.
Adding thickness to give the screws purchase.Simulating the pressure of a tapa. Without a tapa the mechanism will fall out.
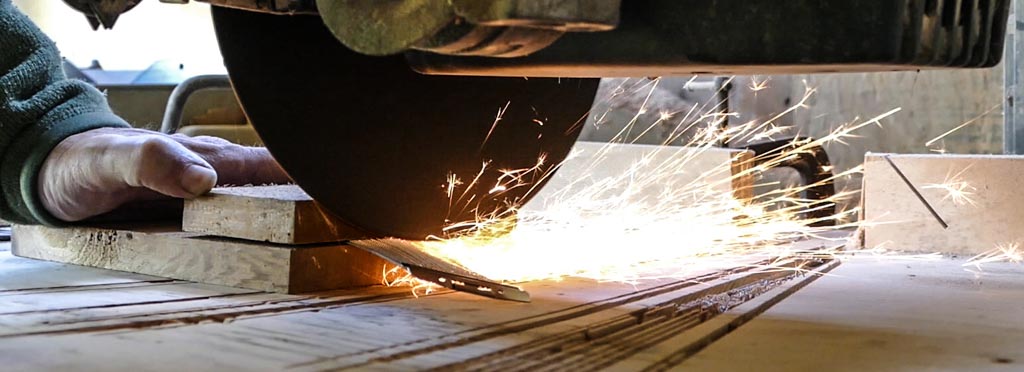
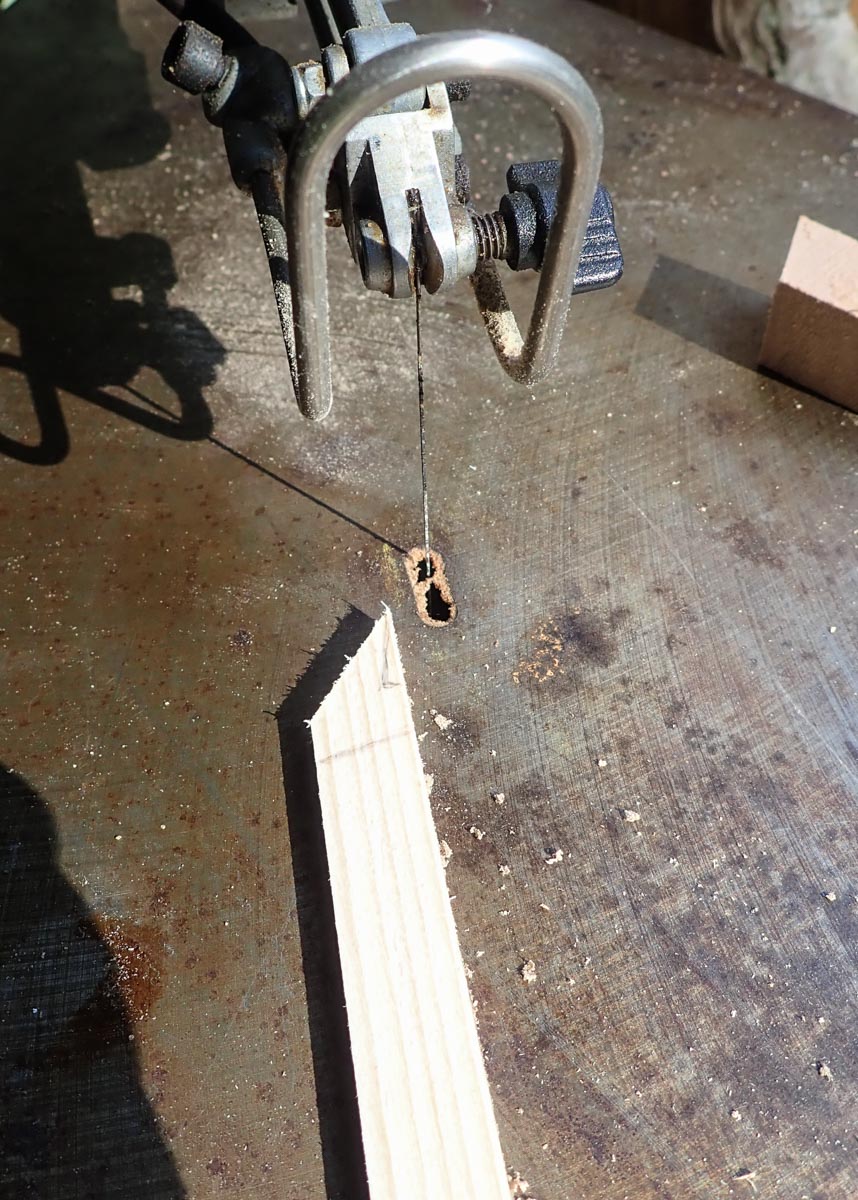
After the mount is built if the wires are too long, cut them shorter. I use a 10 inch metal cutting wheel to cut snare wire, with the wires mounted in a jig it is much easier and cleaner than than with wire cutters. Snare wire is very tough. There are more photos on how to cut snare wire in the gallery at the end of the blog.
Cutting snare wire
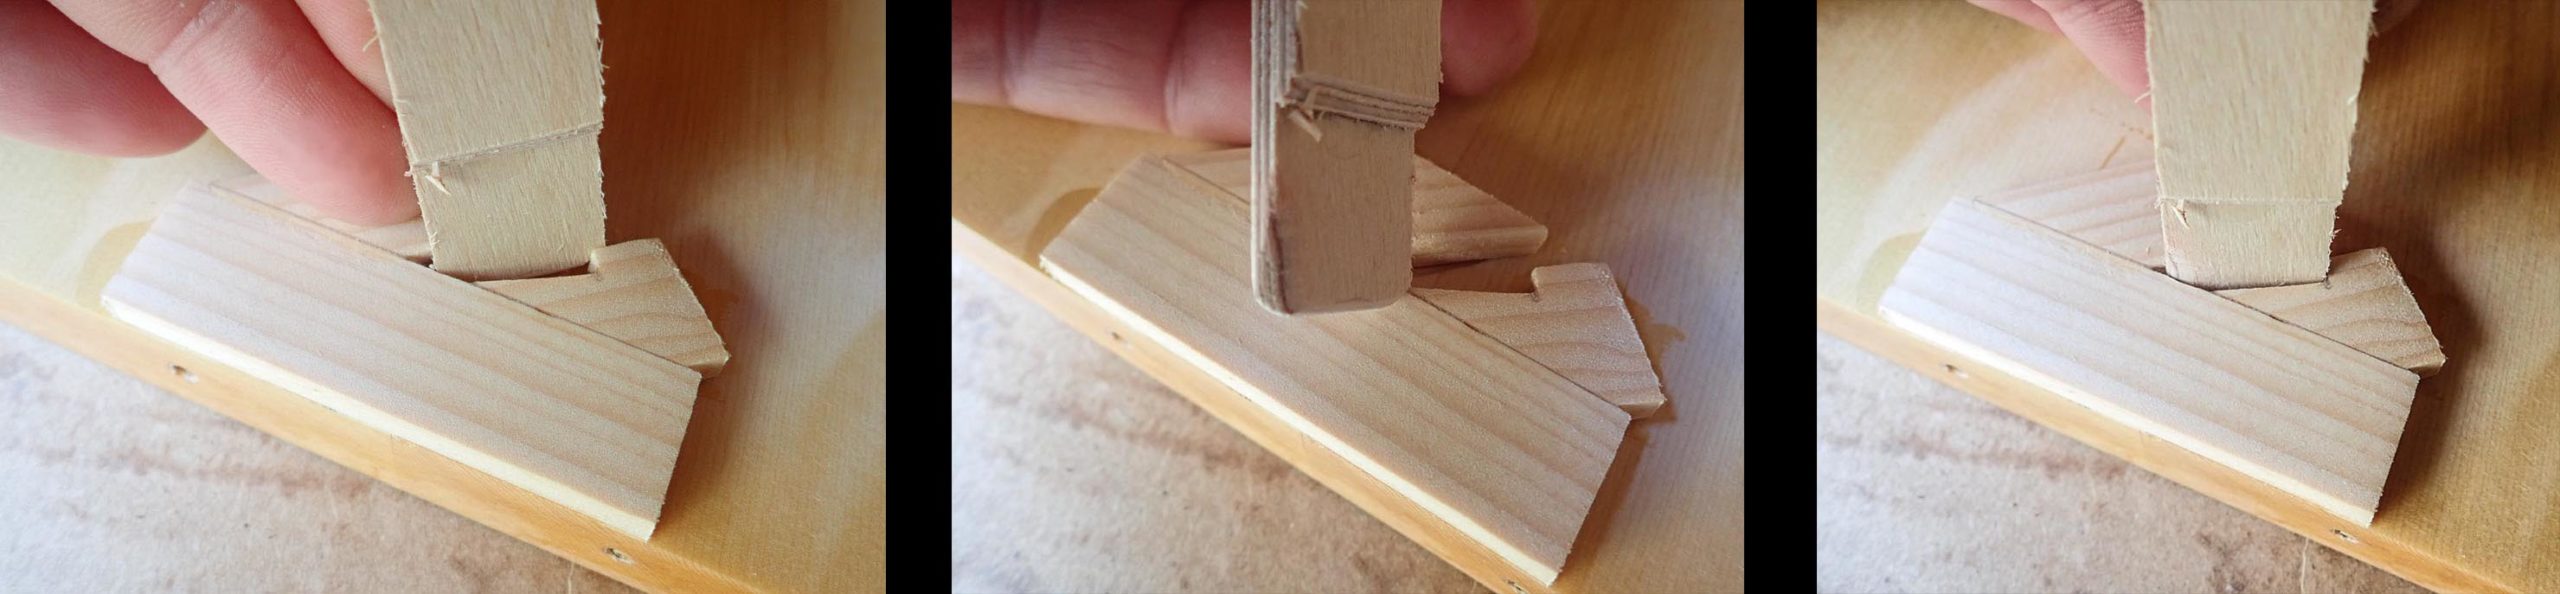
Mounting Brackets
The bar is held in place by small notches in the mounting pieces and by the tension of the snare wire strings pressing against the tapa.
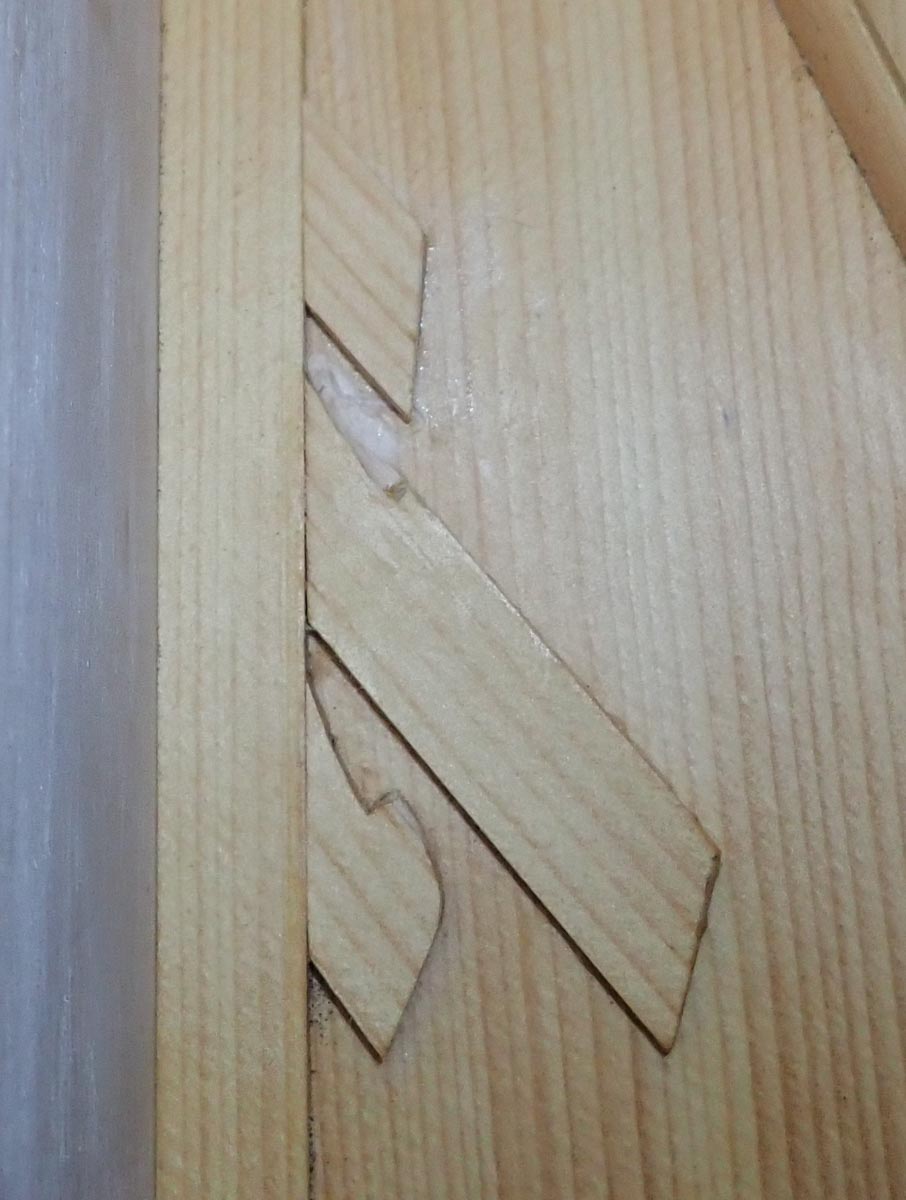
Four examples of bracket mounts for the flexible bar attached to the side of cajons. The three to the left have long backing pieces. The right most example with the short backing piece is not recommended, it proved difficult to insert the bar.
The bar mounting pieces are small. It’s nice to have a hand or mechanized scroll saw to shape them. I experimented with different lengths for the mounting brackets and found that a short piece with the notch is good but it is better to have a long backing piece. It makes it much easier to put the device in.
I’m currently using a bar to tapa angle somewhere around 30 to 40 degrees but I’m still experimenting. If the angle is too steep there will be little or no snare. If to shallow the device could fall out. The distance elevated from the tapa is very important. It must be close to the tapa, but not too close. Right now I am using about 15mm. This is a new design, please think of the measurements as preliminary. I don’t want to lock anyone into numbers that may not be optimal. If you make this design you are part of an experiment and please let us know what worked and didn’t in the comments.
I cut the slot for the bracket a little small. After the bracket pieces are glued in I round the contact edges/corners of the bar until the device slips into place.
Shaping the ends of the flexible snare bar to ensure a tight fit.
The snare wires are held against the tapa by the combined pressure of the flexible bar, the inclination of the snare wires and the notch in the bracket. The pressure of the wires slightly bends the flexible bar. With each hit the bar flex and string rebound combine to produce a good snare sound.
Flexible snare wire bar inserted but not yet snapped into place.Flexible snare wire bar inserted in to mounting bracket and snapped into place. With the tapa on the cajon, the mechanism will stay in place.
If you want you can make two layers of mounting brackets. This will enable you to position the bar high or low. Which will change the amount of snare. The photo below shows the basic idea but it was the first and only time I have tried this so the shape of the pieces was not optimized. Next time I’ll make them progressively longer to help with getting the bar in. This will give you the option of a little snare or a lot. But you’ll get a lot of snare sound in the bass using the lower position. You could also have multiple flexible mounting bars, the one to fit the lower mounts could have longer snare wires, angled in or not.
Multple mounting brackets enable the bar to be placed higher or lower, changing the amount of snare.
There’s no on-off mechanism. Simply remove the snare bar to eliminate the snare sound. The only fine tuning is which level you place the snare.
Solid wood cajon with edging, snare brackets and internal bracing.
Jig for cutting snare wires
Softwood used to make jig
Snare wires cut clean
The exposed screw ends should be ground flat.
Exposed screw ends
The ground down ends of screws holding the snare wires.
Cutting bracket notch
Ruler in inches
Cajon snare wires bracket pieces
Grinding down the exposed ends of the screws holding the snare wire.
Facebook Cajon Forum member Peter Wolf had some good observations about the downward facing sound hole: “… the sound depends on the floor, where you play. If there is concrete, the sound will be hard and loud, if there is wood, it will be softer and not so loud, an if you play on a thick carpet, there will not be very much sound. And if you rock with your cajon, the sound changes also.” Here is my edited response:
I agree that the design is not perfect. The floor does affect the sound. But a regular cajon has a sound hole facing backwards, away from the audience. If the situation is perfect the wall behind reflects the bass back to the audience and player. But if there is no wall? Or if it is metal or sheet-rock or brick, it will affect the sound. So both styles have sound hole placement issues. I play the bottom facing cajon mostly on a carpeted floor and prefer the sound vs on a wooden floor. I haven’t tried these on a cement floor or on a super-thick carpet. The thin carpet I use them on does not effect the sound much. I consider the floor issue as just a different variation of the same issue that a rear-facing sound hole has.
The other thing you mention, the effect of the player tilting backwards, I now consider to be a desirable feature. You can ‘tune’ these cajons by selecting the feet height that gives you the desired amount of bass. If you ‘tune’ it so they have just a little less bass when they are flat on the floor, you can add a little punch by angling the cajon backward as you play.
A big advantage of this design is the easy placement of the bass mic, it simply goes on the floor in front of the cajon, if the floor is wood I put a small piece of foam under it. Tilting the cajon has minimal effect on mic pickup and slight movements of the cajon have minimal effect on the mic. Whereas a cajon with a sound hole on the back has to have a mic stand of some sort and small movements in the cajon can effect or even hit the microphone.
With a mic on a backwards facing sound hole the player is mostly unaware of the effect of their movement on the mic placement. Dealing with rear sound hole issues has spawned a number of pricey, cajon specific mic’ing systems. With the downward facing sound hole you can always quickly see where the microphone is sitting. Any microphone will do and heavy bass microphones sit stable on a small piece of foam.
Perhaps the biggest issue I have with the downward facing sound hole is that it works too well, much of the sound is channeled forward. The cajon player doesn’t hear the full richness of the cajon. It’s easy to test this by simply leaning forward a little as you play, the tone and bass becomes more obvious. Sometimes I’ll sit directly in front of a low window or a solid door to reflect the sound back as I practice. This is a common issue with instruments that project their sound forward, trumpets, trombones etc. When evaluating the sound of any cajon it is best to also listen to someone else play the cajon.
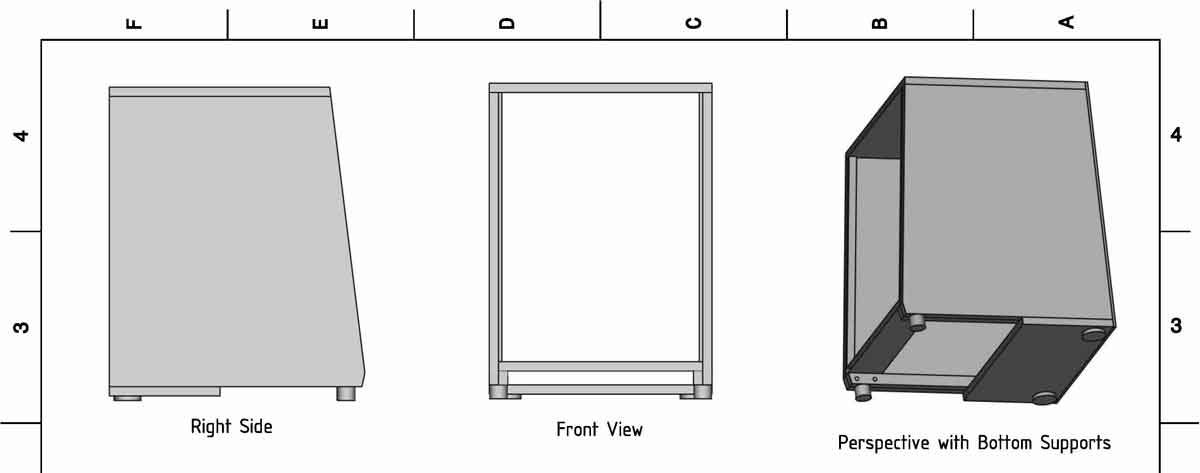
This article describes the latest construction design and details of the Firebox Cajon ‘Open Hearth’ design. It uses technical drawings, photos and text to help guide you through the process of building a cajon. Please see the related blog for a discussion on the features, pros and cons of this design.
The plans are full of construction tips. Use the photos below to help understand the drawings and construction tips. The plans present two variations in the design: Option A uses long ‘bottom support’ pieces, Option B uses short ‘bass bar support’ pieces. The plans are free for your use but not for redistribution, re-purpose and not to be used commercially.
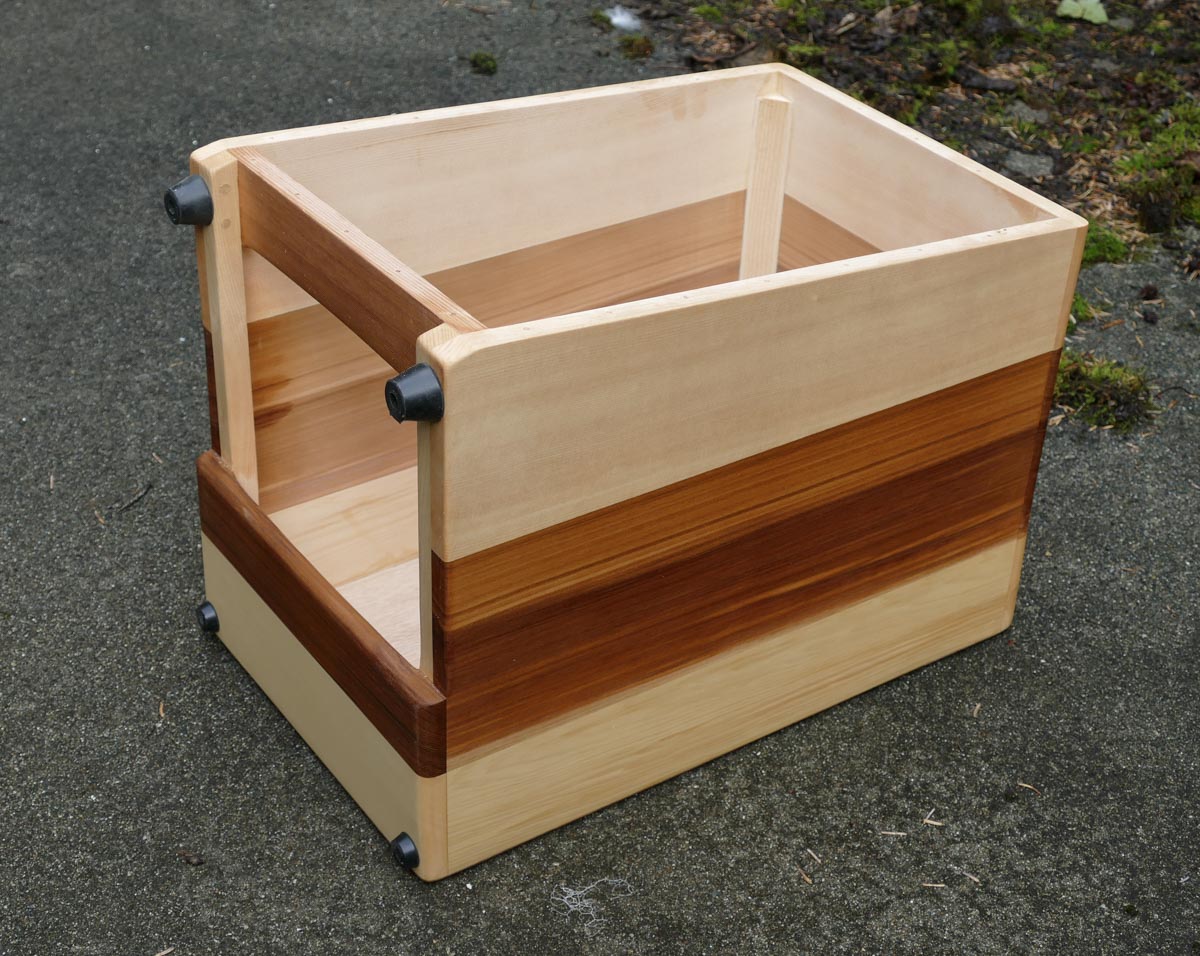
Assembled Parts
This design has an inclined front which makes construction a bit more difficult than a typical rectangular cajon. The side panels are based on ‘right trapezoids’ not rectangles. However, because the pieces create a large rectangular sound hole, there is no need to cut and shape a large circular sound hole as with traditional cajon designs.
Option A: cajon with downward facing sound hole using ‘bottom supports’. This cajon is a mix of Western red cedar and Sitka spruce
Option B: Short ‘bass bar support’ in place. This cajon is made from solid Sitka spruce.
The plans use 1/2 plywood for the cajon box. Many commercially produced cajons use plywood from hardwood trees, either birch or tropical hardwoods. Many cajon makers use solid hardwood. Cajon builders usually recommend plywood with more plys and fewer in-sheet gaps. Marine plywoods can be used. Cabinet grade plywood produces a nice looking cajon. Specialty plywood stores can supply multi-ply hardwood plywood. I have also used 3/4 inch softwood plywood with good results, although the cajons are heavy.
Side Panels
The plans produce a cajon which is about 17 inches tall, which is short for some folks. Modify the plans to suit your height. I never cut all pieces at once. I start by cutting the right trapezoid shape to the height I want, then fit everything else to suit the sides. Cut the small notch at the bottom front after the bottom support/bass bar support is glued in place.
Left and right side panels with bottom support glued on.
It is important to get the cut on the front as continuous and clean as possible. You don’t want to have to sand the front surfaces. The tapa must seal well to maximize the bass, tone and volume. I typically make the top and bottom cuts, then the front cut, and finally the back cut.
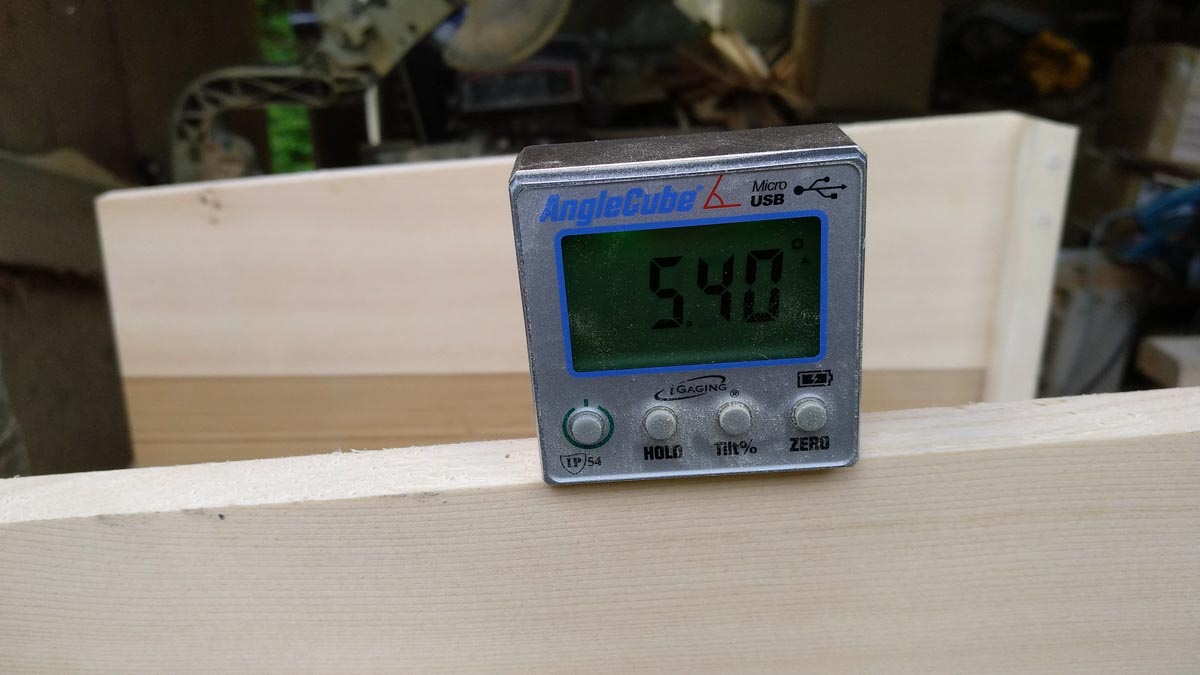
Once the sides are cut, measure the front angle.
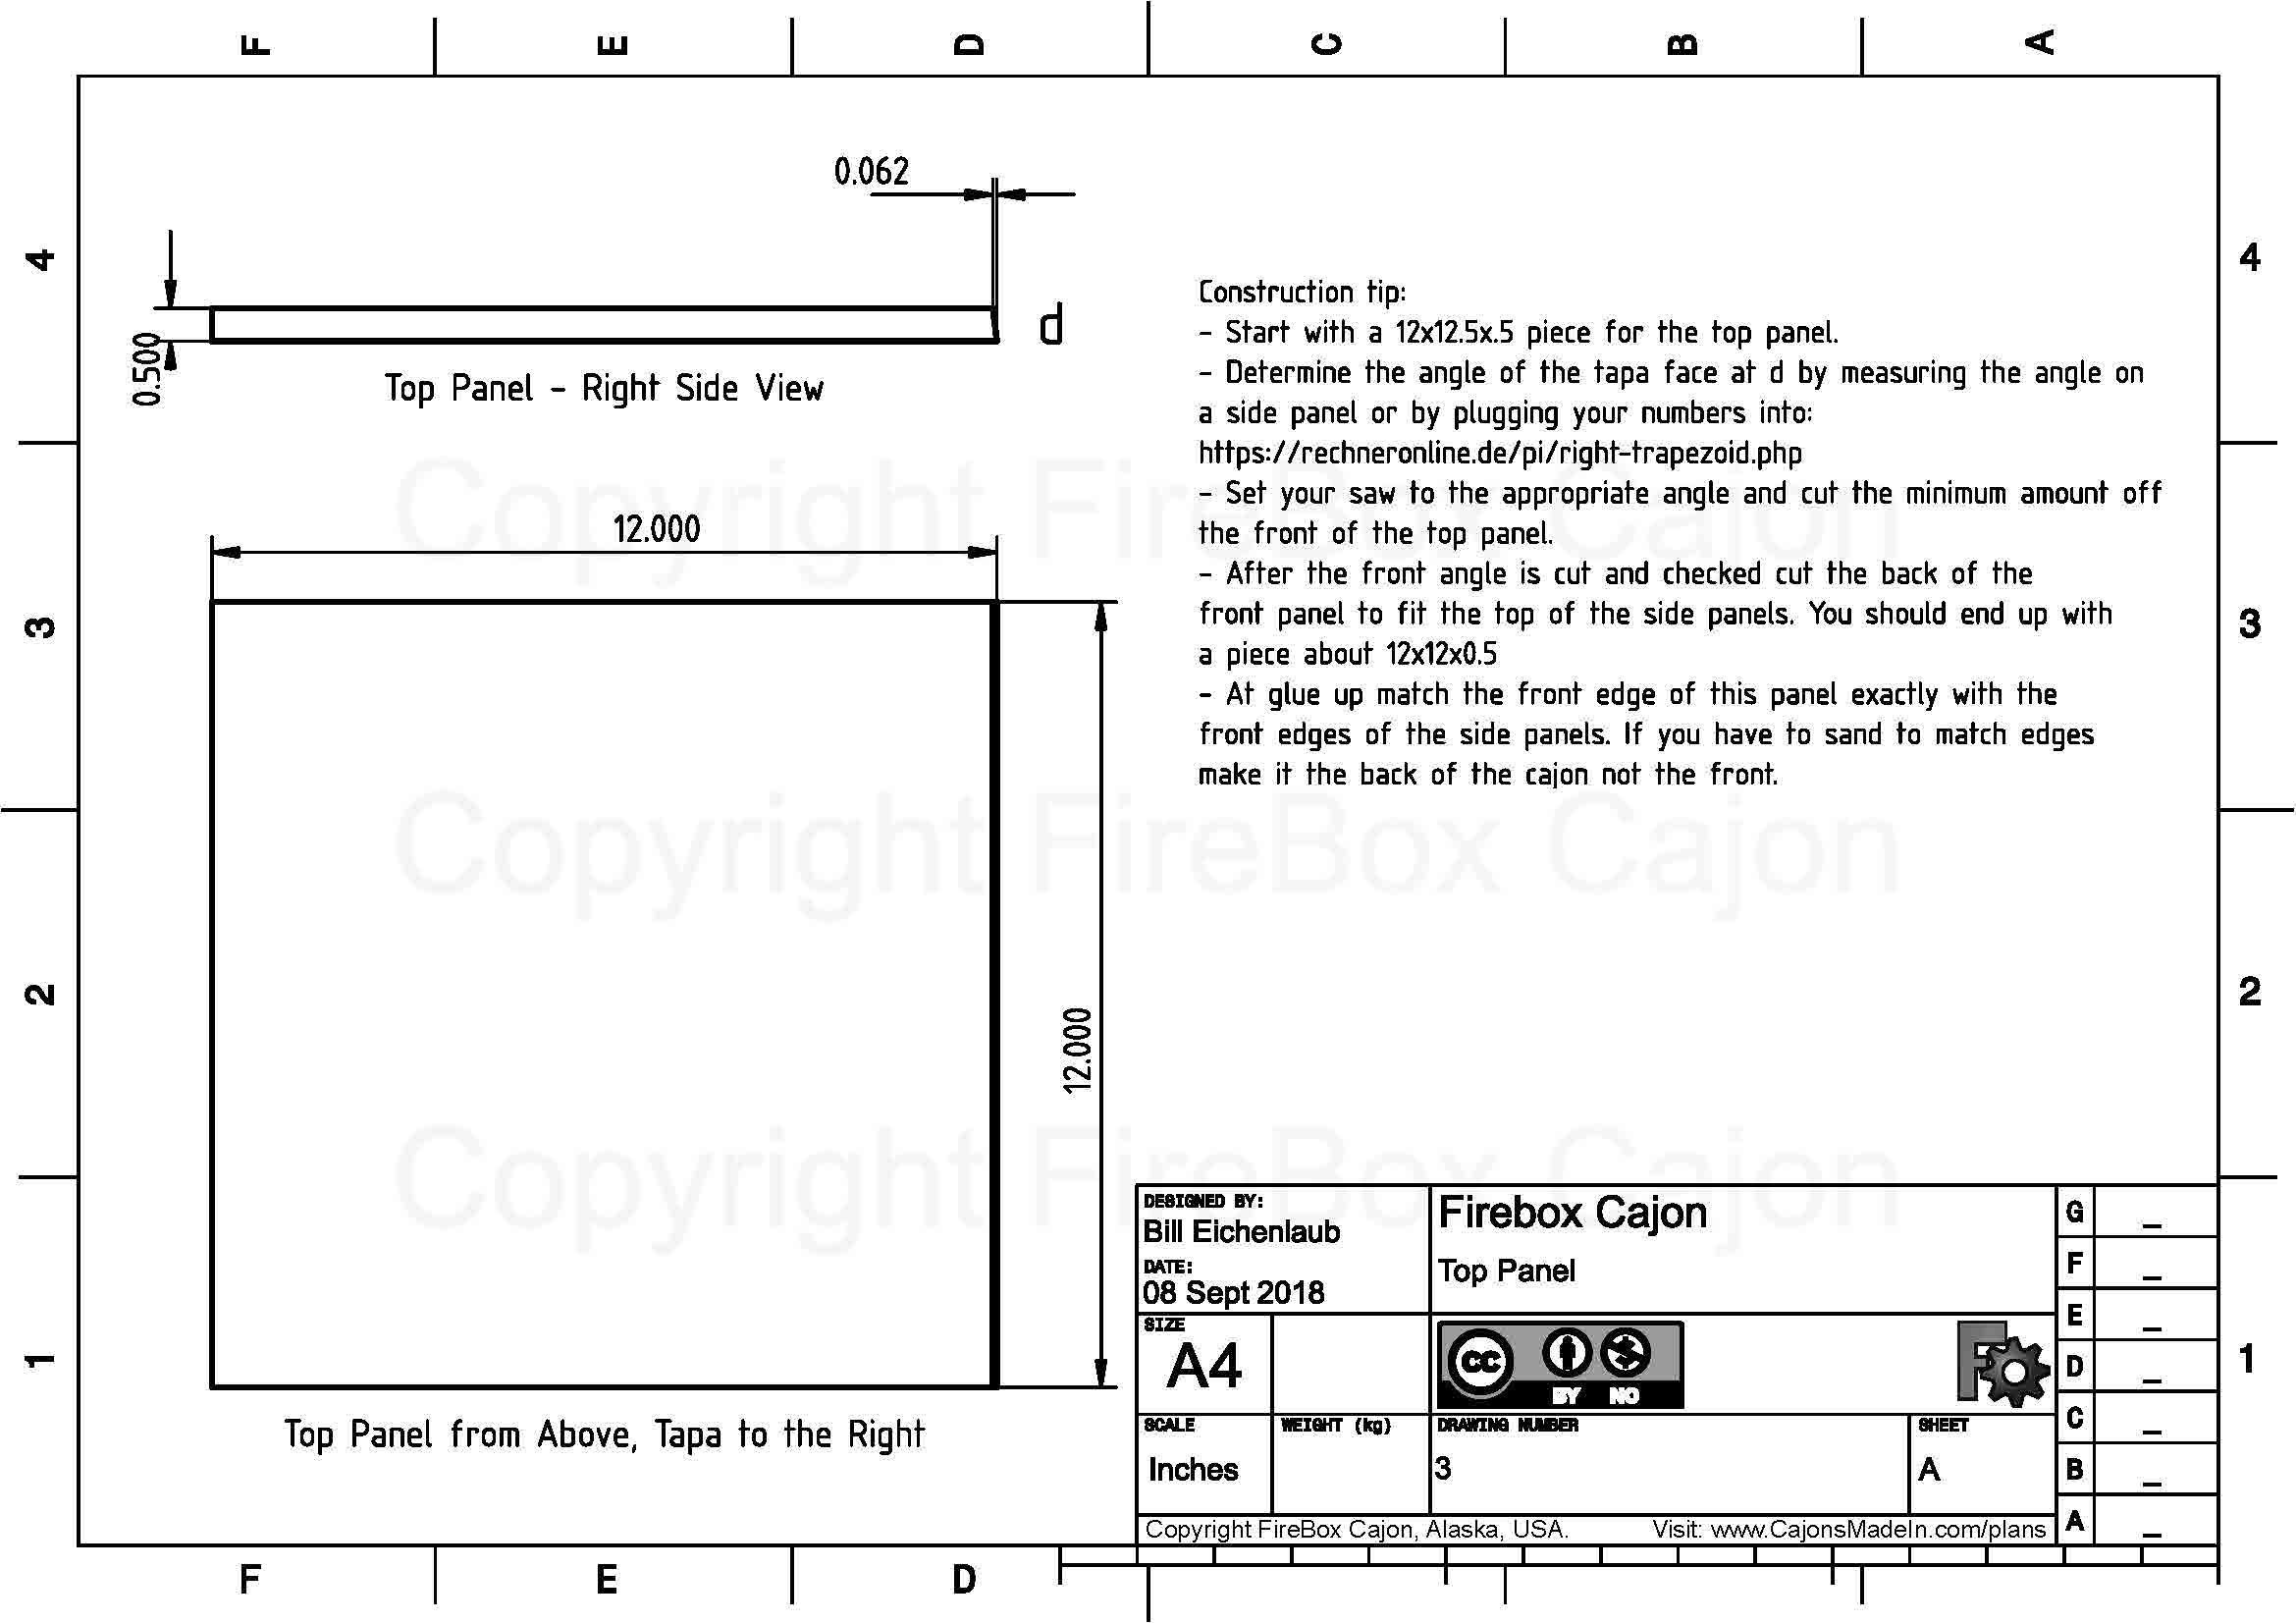
Top Panel
Typically I’ll cut the top to the desired width, then cut the angled front. When the front cut is perfect, I’ll make the back cut on the top such that the top fits the top of the side panels perfectly. The front angle of the top panel must match the angle of the front of the side panels.
Bottom Supports
I prefer Option A, long bottom supports. I think they are faster to make and add strength. I glue them on before cutting the angled front surface. This gives a cleaner joint. Option B, bass bar supports produces a bigger sound hole. I’ve not made enough cajons with these options to have an opinion on which produces ‘better’ sound.
Cutting the glued side panel and bottom support.
The dowels are added after the bottom support is glued on. The screw for a rubber foot will go between them.
Bass bar support with an additional thin strip of wood to reinforce the end grain. Not necessary if you are using plywood sides.
Bass Bar
The bass bar holds the bottom of the tapa and is the principle support element spanning the front. I use a 2.25 inch wide piece but it is worth experimenting with wider or even narrower pieces. This piece is often used to carry the cajon so I typically round the edges in the back which is not shown in the drawing. The front of the bass bar must be cut at the same angle as the front of the sides to ensure a tight fit of the tapa.
Bass bar with rounded back edges in place on bottom supports.
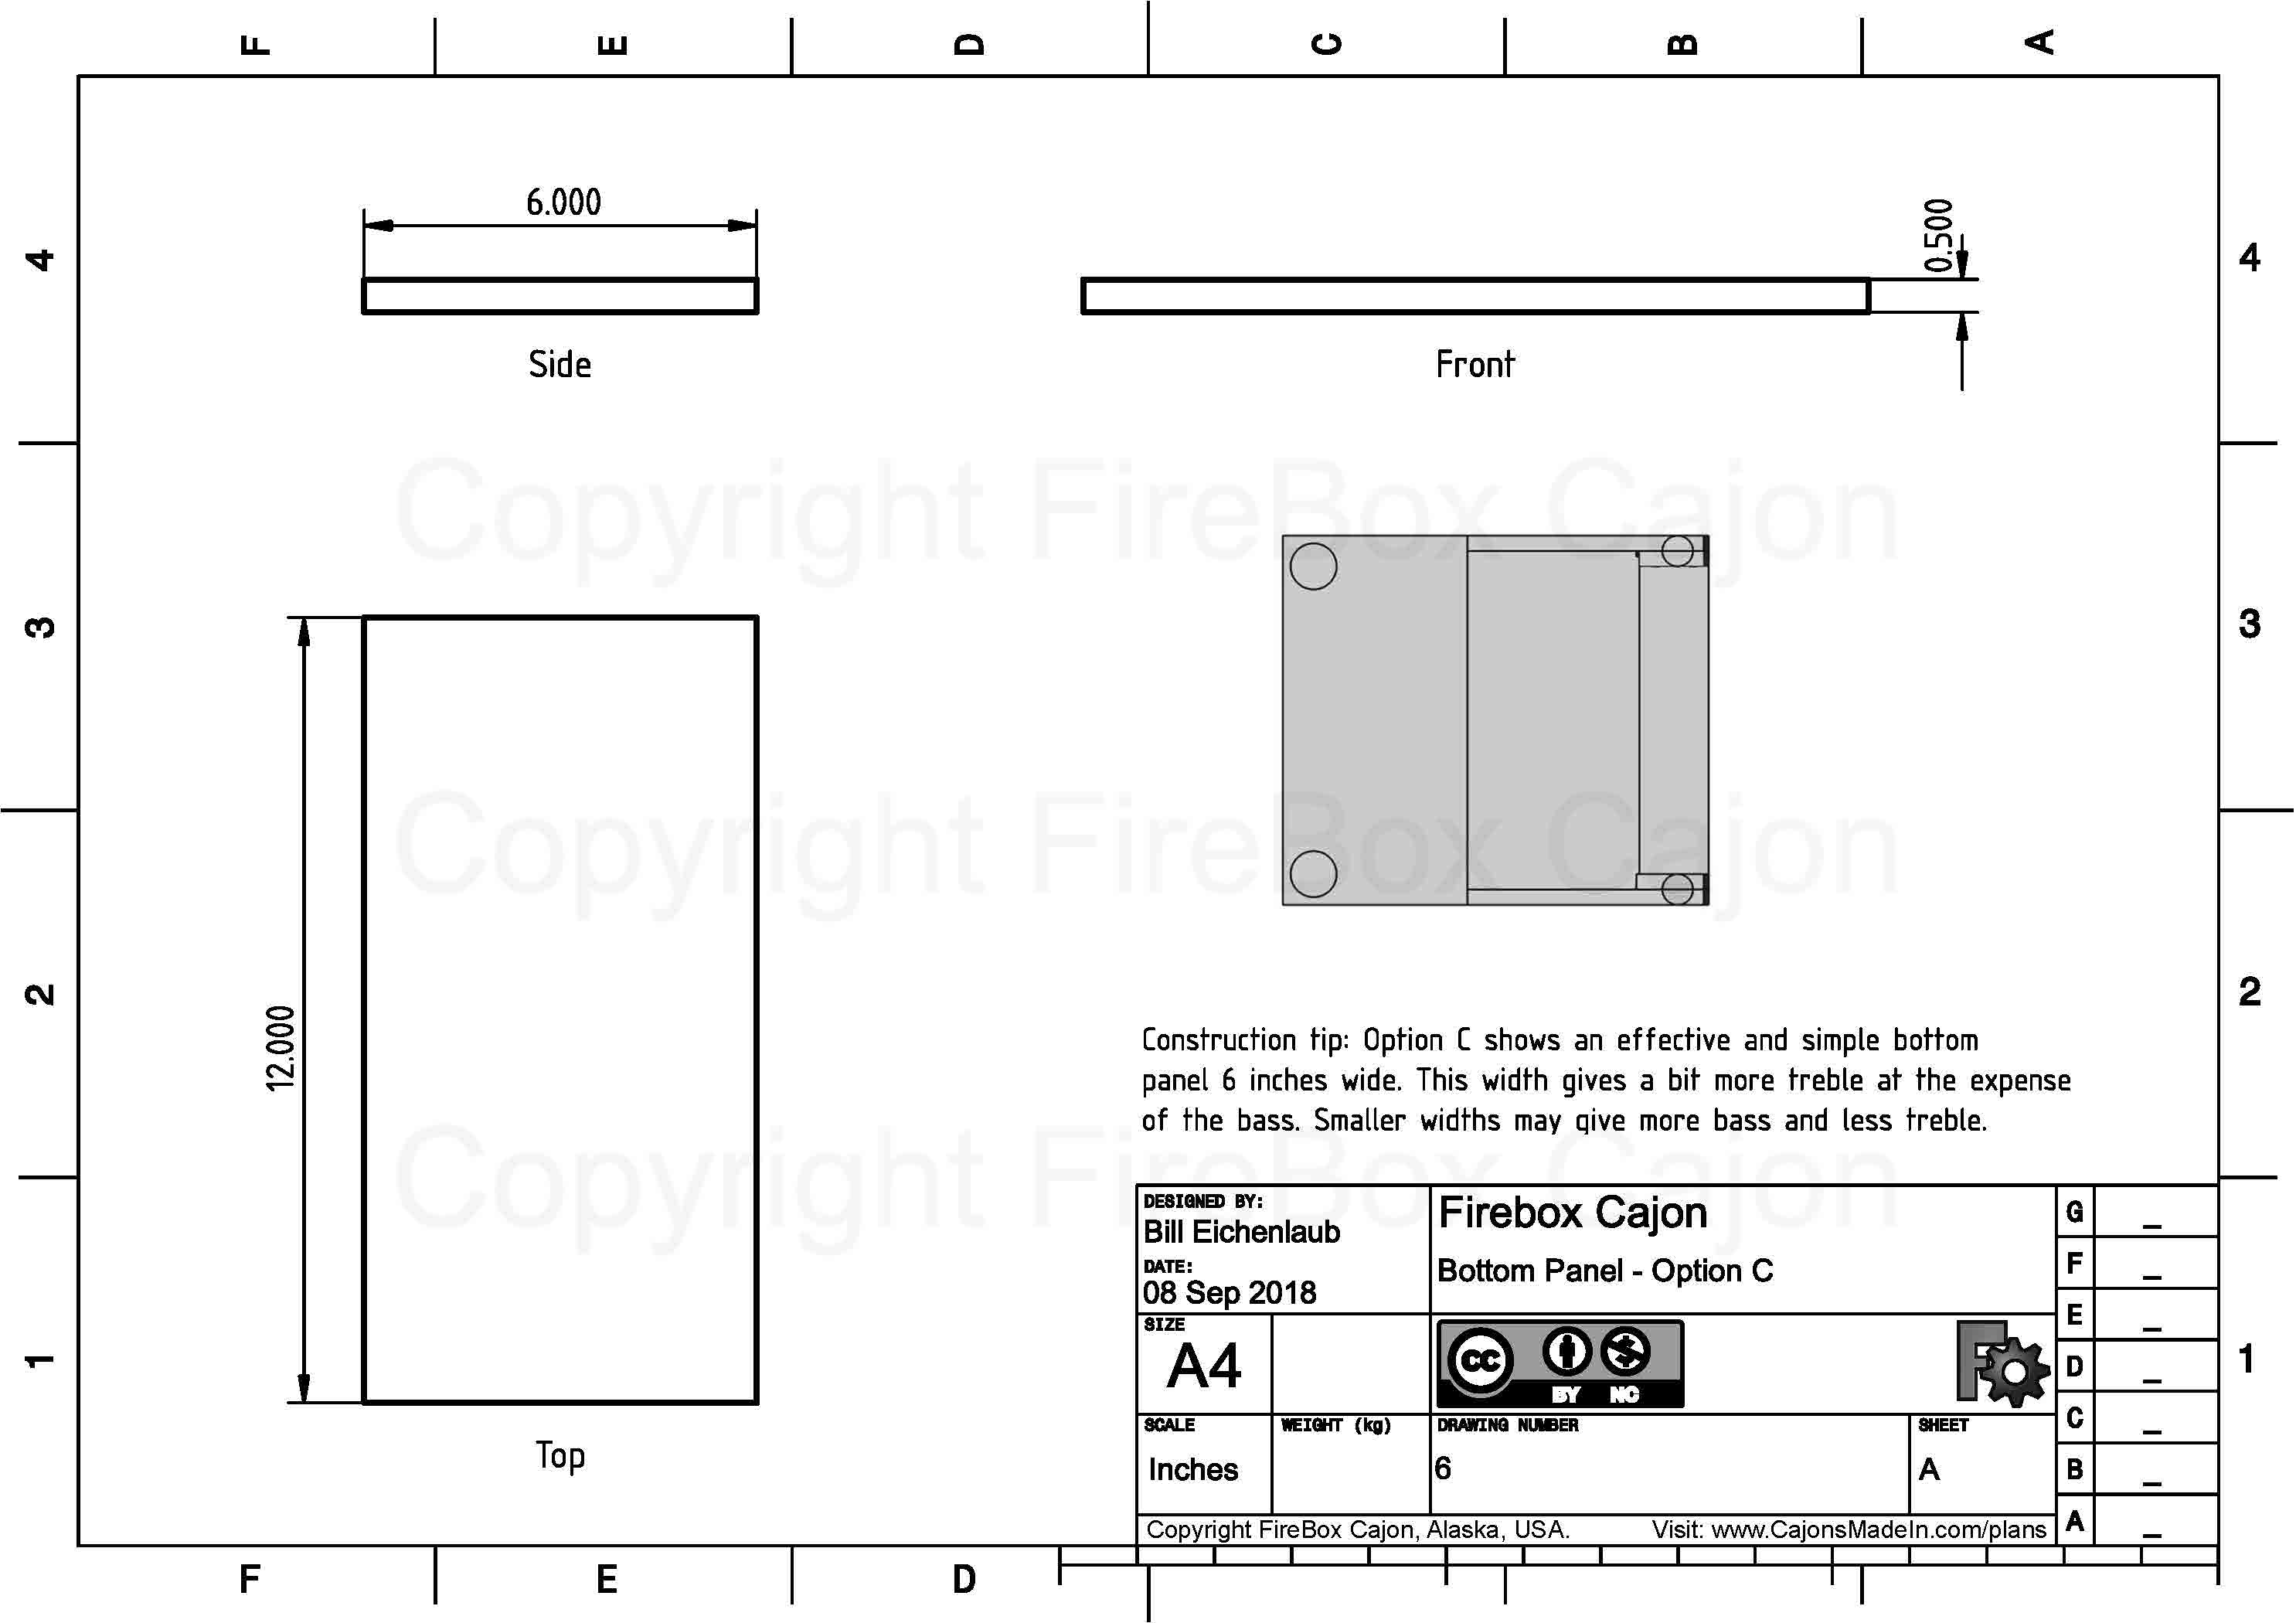
Bottom Panel
The simplest bottom panel is a rectangle. The plans include a bottom panel with a cut out but I’ve not yet made one this way. I’ll update this when I can. I round out the edges of where appropriate which is not shown in the plans.
The bottom panel is the lowest wooden piece on the cajon. View is from the back to the front. The bass bar spans the front of the cajon and sits on top of the bottom supports.
Rubber Feet
The back feet and front feet are different sizes. The back feet should be low. The front must be high enough to level the cajon. There seems to be some complex interactions between the width of the bottom panel, the width of the sound hole and the height of the feet. A small difference in the height of the feet can make a big difference in the sound of the cajon. In general too high is better than too low. I try different feet to get the best sound. Although the plans suggest 0.75 to 1 inch I find myself using 1 inch most of the time. Rubber feet can be screwed to a scrap piece of wood and sanded to desired height on a bench sander.
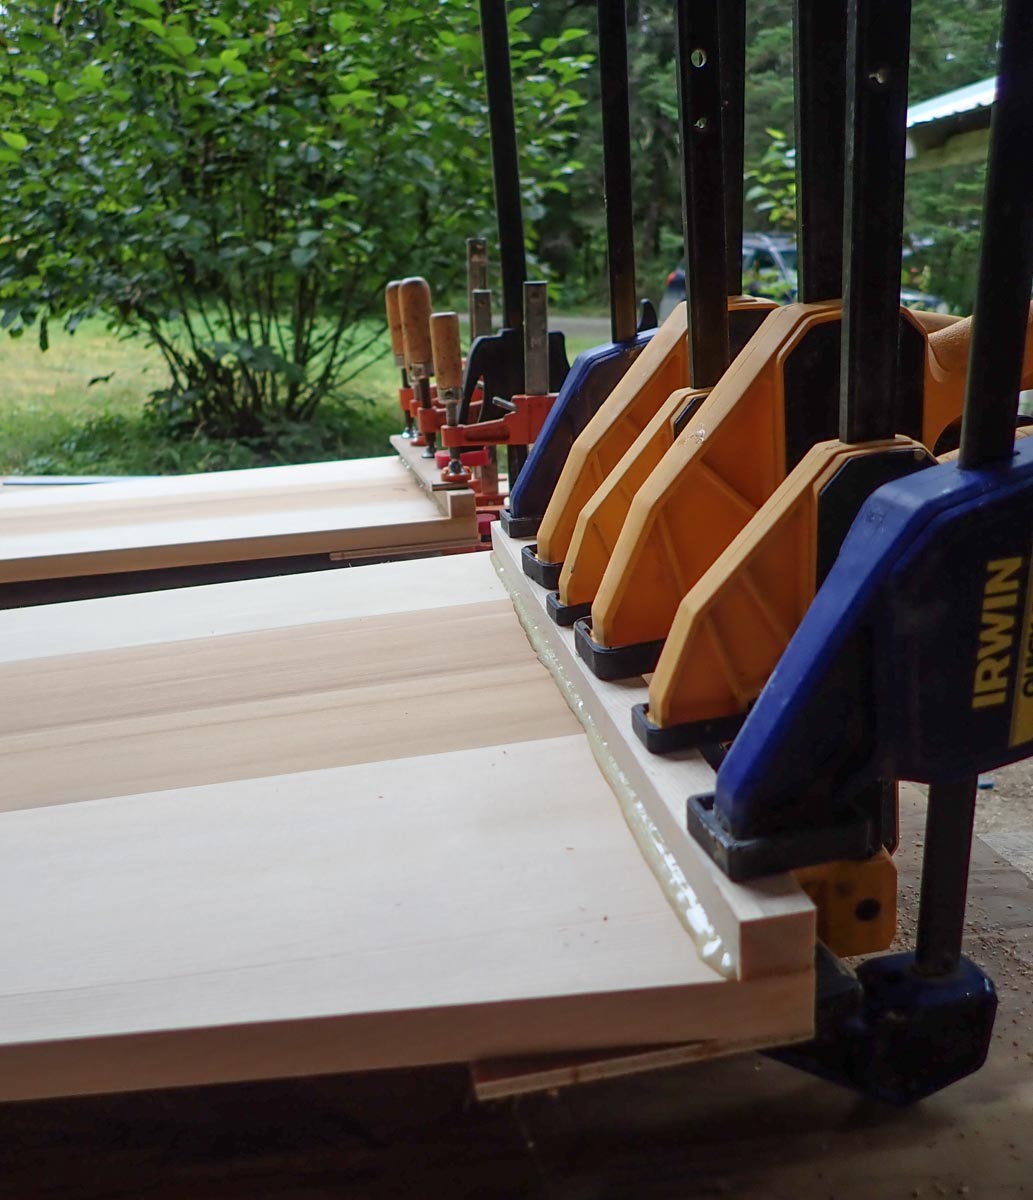
Glue-up
The bottom supports are glued to the sides first and the dowels put in. When this is dry all pieces are glued. First the bass bar support is glued and clamped to the two sides and immediately after the top and bottom are glued and clamped to the sides.
Gluing the bottom supports (Option A) to the side panels.
Gluing the bass bar. This cajon uses bass bar supports, Option B.
I believe in at least 4 clamps on each side. But not too tight!
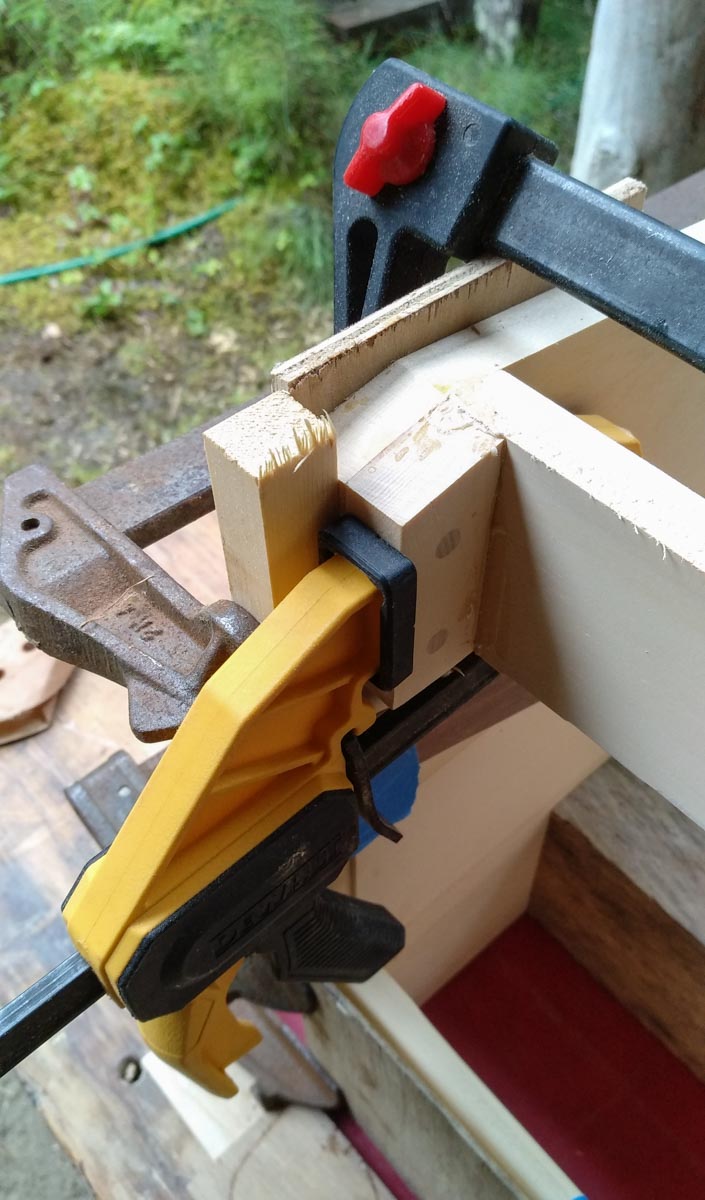
Corner braces are glued in after the box is dry.
Gluing triangular shaped corner braces between the top panel and the side.
Gluing corner brace between the bottom panel and the side. Only necessary if bass supports are used.
I use 0.093 inch thick Lexan for most of my cajon back panels which I attach with 2 part epoxy and screws. If I use wood I am now inclined to use thicker dimensions for the back. The original plans suggest 4mm but I’ve updated them to 0.5 inch thick. I think that for many types of plywoods 4mm is too thin. Commercial cajons use thin, dense hardwood plywood for the back. The awesome cajons made in Peru use thick solid wood on the back and have a great sound. But they are heavy. If I was making a cajon out of hardware store plywood made from softwood trees, I’d use 1/2 plywood for the back panel as well. If I had dense hardwood plywood I’d use 4 mm or thicker.
The Tapa
The tapa is the front of the cajon, the striking surface. It is the ‘drum head’ of a cajon, it needs to flex so 2.5 to 3 mm is typical. I use 3 mm, 3 ply ‘birch’ plywood from the local hardwood store for my tapas. I believe the inner ply is not actually birch, only the thin outer skin. I’ve also used recycled hollow door skins successfully. Older hollow doors skins were made from tropical hardwood and produced excellent tapas. Commercially made cajons often use 2.5 to 3 mm, 5 ply birch hardwood plywood for the tapa. 5 ply birch plywood can be found on the internet from specialty plywood suppliers.
Screws hold the tapa in place. I’m inclined to use a lot of screws. My current thinking is the tighter the box, the better the sound. The gaps between screws leaves possible air escape passages. Some commercial cajons now glue the lower portion of the tapa and use screws on the upper parts. Screws should be countersunk.
Round the Edges
The plans don’t show it but it is important the round the edges and corners, especially the top. A cajon with hard edges is difficult to sit on for long.
Snare Wires
Many cajons include snare wires pressed against the inside of the tapa to produce a rattle. There are many possible snare wire configurations. I don’t include any in these plans. My snare system is simple to construct but is not adjustable when playing. Check out the photos in this Pinterest board for other ideas. I think any of these snare wire designs would also work in this cajon design.
The Finish
I use 100% pure tung oil on the tapa. It is all natural and the players hands will have direct contact with the tapa. The box can be finished with just about any finish you’d like. It’s a drum so it will need to take some abuse.
Completed cajon with a 100% pure tung oil finish.
Time to Completion
Folks often ask me how much time it takes to make one. That’s a tough question for me because I usually have several cajons in the works at one time and life in general often creates work gaps. And plywood vs solid wood will also effect the time it takes to make one. Plus there are four steps, 1) gluing the bottom support to the sides, 2) gluing the box together, 3) gluing the corner braces and 4) attaching the back, where the adhesive should dry overnight. Depending on the finish you use it will need to dry days to weeks. I think a skilled woodworker with a good shop could cut and shape the pieces from plywood in an hour or two. Gluing and clamping after that should take a couple more hours. Sanding and finishing a couple more hours. Add to this time the overnight glue drying and a week is about right. I often take two weeks start to finish.